Saturday, February 28, 2009

Chocolate Valentino Cake and Black Peppercorn Ice Cream


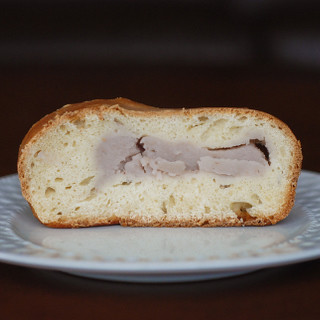
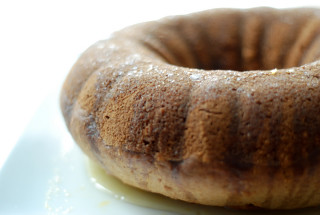
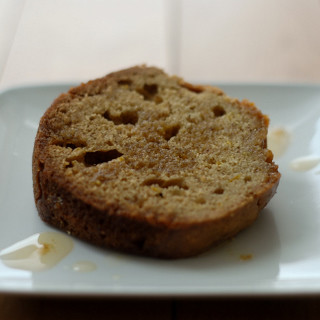
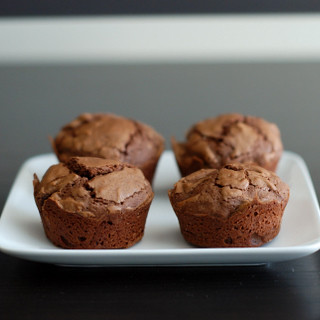
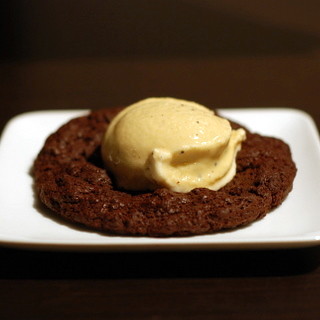
February has reached its end, and that means it's time for another round with the Daring Bakers. This month we were to make a flourless chocolate cake and pair it with a homemade ice cream, and I'm afraid my cake turned out to be a flop, literally. I was impatient in waiting for the egg whites to form stiff peaks, and I went ahead and folded in the soft-whipped egg whites. My "cake" turned out to be one giant dark chocolate cookie. Fortunately, it tasted just fine, as as Wendy and Dharm mentioned, it tasted exactly like the chocolate used.

Making the ice cream was a complete experiment for me. I've never made ice cream before (frozen yogurt - yes, just not ice cream), but I was determined to make a peppercorn ice cream to pair with the dark chocolate cake. I used a recipe for pink peppercorn ice cream and substituted in black peppercorns, and I was pleased with the results.

I would eat neither the cake nor the ice cream on its own, but when eaten together, it truly is perfect harmony. Tim even described it as a very "adult taste." Whatever he meant by that, I'll take it as a complement.

The February 2009 challenge is hosted by Wendy of WMPE's blog and Dharm of Dad ~ Baker & Chef.
We have chosen a Chocolate Valentino cake by Chef Wan; a Vanilla Ice Cream recipe from Dharm and a Vanilla Ice Cream recipe from Wendy as the challenge.


Chocolate Valentino Cake

Ingredients:
10 ounces 100% cacao Ghirardelli chocolate
6 ounces 72% cacao Ghirardelli chocolate
1/2 cup plus 2 tablespoons unsalted butter
5 large eggs, separated

Directions:
1. Put chocolate and butter in a heatproof bowl and set over a pan of simmering water (the bottom of the bowl should not touch the water) and melt, stirring often.
2. While your chocolate butter mixture is cooling. Butter your pan and line with a parchment circle then butter the parchment.
3. Separate the egg yolks from the egg whites and put into two medium/large bowls.
4. Whip the egg whites in a medium/large grease free bowl until stiff peaks are formed.
5. With the same beater beat the egg yolks together.
6. Add the egg yolks to the cooled chocolate.
7. Fold in 1/3 of the egg whites into the chocolate mixture and follow with remaining 2/3rds. Fold until no white remains without deflating the batter.
8. Pour batter into prepared pan, the batter should fill the pan 3/4 of the way full, and bake at 375 degrees F.
9. Bake for 25 minutes until an instant read thermometer reads 140 degrees F.
10. Cool cake on a rack for 10 minutes then unmold.


Black Peppercorn Ice Cream
recipe adapted from Chika Tillman

Ingredients:
2 cups heavy cream
2 cups whole milk
3/4 cup granulated sugar
1 tablespoon whole black peppercorns, crushed
8 egg yolks

Directions:
1. Heat the heavy cream, milk, sugar, and pepper in a medium saucepan over medium heat. Bring mixture to a simmer, stirring occasionally to dissolve the sugar.
2. Remove from heat and let mixture steep for 20 minutes. Meanwhile, place the egg yolks in a medium mixing bowl and beat well with a wire whisk.
3. Return the cream mixture to medium heat and bring to a simmer again. Remove from heat. Temper the hot mixture into the eggs by slowly pouring the cream into them in a thin stream, while constantly whisking the eggs with a whisk.
4. Strain the egg-and-cream mixture through a fine-mesh strainer back into the saucepan. Return it to the stove and cook over medium-low heat, stirring often with a wooden spoon, until the custard base has thickened enough to coat the back of the spoon.
5. Cool the custard in an ice bath until it is completely cold.
6. Freeze the custard in an ice cream maker, according to the manufacturer’s instructions. Place in a covered plastic container and store in the freezer overnight.

Friday, February 27, 2009

Taro Mochi


Last week's post featured the taro bread I made after reminiscing the food I grew up with in Houston. This week I took the same taro paste recipe and used it in this taro mochi. I've made mochi a time or two before, but I never successfully made a filled mochi until now.

There are so many different ways to eat mochi, I really can't pick a favorite way. I primarily make a simple sweet mochi to top my homemade frozen yogurt, but last year I started frying blocks of plain mochi, wrapping it in seaweed and dipping it in soy sauce for a delicious savory snack.

When making a filled mochi, you have to work fast to get it completely enclosed around the filling. A lot of pinching is involved to seal the ball, and I recommend being liberal with the potato starch to minimize the amount of mochi stuck to your hands.

You'll notice my mochi is purple, and that's because I added in some taro milk tea powder. I did so for an extra oomph of taro flavor, but also so that you can tell what kind of mochi it is by its color. That, and I do love the color purple.


Taro Mochi

Ingredients:
1 cup Mochiko sweet rice flour
1 Tb taro milk tea powder (as used in taro mousse)
1 cup water
1/4 cup sugar
1/2 cup taro paste (described in taro bread recipe)
potato starch, for dusting

Directions:
1. In a medium bowl, mix mochiko, taro powder, and sugar. Add in water and combine thoroughly.
2. Spread mochi mixture in 9 x 11 Pyrex or other microwaveable dish. Cover with plastic wrap.
4. Microwave on high for 4 minutes. Take off plastic wrap and let cool about 4 minutes. Mochi should still be warm yet cool enough to handle.
5. Cut mochi into 12 large squares (roughly 2"x2").
6. Taking one square at a time, spoon 1/2 teaspoon of taro paste in the middle of moch square. Pinch edges together to seal and mold mochi into a ball. Dust immediately with potato starch to prevent sticking.

Friday, February 20, 2009

Taro Bread


Tim and I had a great time in Houston last weekend - we spent quality time with my parents, ate a lot of great food, and met up with some of my oldest and dearest friends. And when I say old I mean longest relationships.

Well, it's been about a year since my last visit to Houston, and I've got a couple things to note. First, I love I-10! Last I saw it, it was still one big mess, but now it's 18 wide lanes of a smooth Texas highway. While driving there, I told Tim that I miss driving, but he corrected me, knowing that I really miss driving on nice freeways like I-10. Tim's right, that's exactly what I meant.

Second thing to note - Houston's Chinatown keeps exploding everytime I visit. Why, I remember when the only supermarkets were Diho and Dynasty, but now there are dozens of them! Dozens! And all the bubble tea shops, cafes, and bakeries multiply right along with the supermarkets. Growing up, I remember our family would frequent a particular bakery solely for their taro bread. Now, it wasn't bread flavored with taro, rather it was a loaf of soft white bread baked with a generous amount of sweet taro paste inside. The loaf was also topped with a light glaze with coconut flakes. I very clearly remember the bread, but all I remember about the bakery is that it's located in Diho square. (I might have to ask around for more details) Well that bread was the inspiration for this post. I took Julia Child's classic white bread recipe and turned it into a taro bread by filling the inside with taro paste.

Making bread is a way to teach me patience. I clearly don't have any as I didn't wait the entire 45 minutes for the bread to double in size before sticking it in the oven, thus my bread didn't come out as full as it should have. I decided to go ahead with the batch to see how it'd turn out, and thankfully it was still tasty, just lacking in the desired texture. I wouldn't change a thing about the taro paste, and now that I have a go-to taro paste recipe, I'm brainstorming what other taro goods I can come up with. I hope you're intrigued. I hope.

Taro Bread
recipe adapted from Baking with Julia

Ingredients:
1/4 cup warm water
1 cup warm milk
2 tablespoons active dry yeast
1 teaspoon salt
1 tablespoon sugar
2 tablespoons unsalted butter, melted
3-4 cups bread flour or all-purpose flour
1 cup Taro Paste (recipe below)

Directions:
1. Pour 1/4 cup of the water into a bowl and mix with yeast. Let sit for 5 minutes.
2. Combine the milk, sugar, and butter. Blend well with the yeast mixture.
3. Using a stand mixer with dough hook, beat in 2 cups of flour into the mixture. Mix slowly until blended then add the rest of the flour.
4. Increase speed and scrape down the sides til the dough comes together. Add salt and mix at medium speed for 10 minutes until dough is smooth and elastic.
5. Turn dough out on lightly floured surface and shape it into a ball then place in a large buttered or oiled bowl.
6. Turn dough so it is completely coated in the fat, then cover in plastic for 45 minutes to an hour, til it has doubled in size at room temperature.
7. Butter a loaf pan.
8. Deflate the dough, and turn out onto a lightly floured surface.
9. Roll out into a 9 x 12-inch rectangle. Spread taro paste around the middle of the rectangle.
10. With the short end facing you, fold the dough into thirds over the paste, creating a roll.
11. Pinch the seam closed, and pinch the ends enough so it will fit in the loaf pan. Place in the loaf pan seam side down.
12. Cover the loaves with buttered plastic wrap and allow to rise again in a warm place for 45 minutes, or until they double in size.
13. Preheat the oven to 375°F and put the rack in the center of the oven.
14. Bake for 35-45 minutes until they are honey brown.
15. Immediately turn out of pans onto a rack to cool.

Taro Paste

Ingredients:
1 1/2 cups small taro pieces (peel and cut fresh taro)
1/2 cup water
1/4 cup sugar (up to 1/2 cup, depending on desired sweetness)
1 tablespoon corn starch
2 tablespoons water

Directions:
1. Boil or steam the taro pieces until cooked. Taro is done when a fork easily pokes through.
2. In a food processor or blender, blend the cooked taro and 1/2 water until it becomes a puree.
3. Mix the corn starch with 2 tablespoons water to make a paste.
4. Combine paste into taro puree and pour into a saucepan.
5. Cook taro puree and paste over low-medium heat, stirring in the sugar. Keep adding sugar until taro paste reaches desired sweetness.
6. Constantly stir the paste, and reduce the heat when the paste becomes thicker. Stir over low heat an additional 10-15 minutes.
7. Remove paste from heat and let cool.

Friday, February 13, 2009

Orange Hazelnut Cake


Many months ago, the lovely Suzana of Home Gourmets sent me a cookbook featuring recipes from the Alps for a little giveaway she did coinciding with her trip to Slovenia. (Thanks again so much, Suzana! I love it!) Still, many months ago, I read it through and marked a few recipes I wanted to try. It wasn't until this week that I actually tried one of them.

I took the original recipe for a walnut cake and transformed it into an orange hazelnut cake. I thought the flavors were fitting for the winter, but ironically we've been having very spring-like weather here in New York! I'm not complaining at all though, and if you know me at all, you know I'd pick hot and humid weather over the cold any day. I guess that's just the Houston gal in me.

And right now this Houston gal is at the airport waiting to board my delayed plane. Tim and I are spending the long weekend visiting my parents. However ya'll are spending the weekend, I hope ya'll enjoy!

Orange Hazelnut Cake
adapted from Cuisine of the Alps by Kay Shaw Nelson

Ingredients:
1/2 cup unsalted butter
1 cup sugar
2 eggs, lightly beaten
2 cups sifted all-purpose flour
1 teaspoon baking powder
1 teaspoon baking soda
1/2 teaspoon ground cinnamon
2/3 cup sour milk
1/2 cup hazelnut paste
grated peel of orange
1 1/2 cups sugar
3/4 cup water
1/4 cup freshly squeezed orange juice
splash of Cointreau

Directions:
1. Preheat the oven to 350 F degrees.Grease a bundt baking pan.
2. In a large bowl cream the butter. Add 1 cup of the sugar and the eggs; blend well.
3. In a medium bowl mix the flour, baking powder, baking soda, and cinnamon. 4. Add flour mixture to the sugar mixture, alternating with the sour milk. Mix well.
5. Stir in hazelnut paste and orange rind. Mix to combine thoroughly. Pour into prepared pan.
6. Bake about 45 minutes, or until a tester inserted into cake comes out clean.
7. Meanwhile, make a thick syrup by boiling together 1 1/2 cups sugar with 3/4 cup water and 1/4 cup freshly squeezed orange juice for 15 minutes. Add in a splash of Cointreau.
8. Pour over the cake while it is still warm. Turn off oven and return cake to the oven for 5 minutes. Serve warm or at room temperature.

Friday, February 6, 2009

Mint Chocolate Brownies


This week I received an earnest email from a coworker, pleading for our Girl Scout cookie purchases to support his daughter's first year as a Girl Scout. He spoke of how she's so close to reaching her goal, and that my purchase will help boost her self-confidence and then, only then, can she succeed in life. Maybe I made that last part up, but if he brought her in to the office, I'll bet she would have made a killing. Who can resist buying cookies from a little girl asking so sweetly? I certainly can't, so I opted for a couple boxes of thin mints. I love that mint chocolate flavor, and when they're frozen - yum.

The thin mints will arrive sometime next week, so in the mean time I made these mint chocolate brownies to have a little taste of what's to come. I used a previous brownie recipe and added a teaspoon of peppermint extract. A little bit of that stuff certainly goes a long way. I think I would like a little more texture in these brownies, but since I usually shy away from adding nuts (per some preferences), next time I'll add in some chocolate chunks to the mix.

Mint Chocolate Brownies
adapted from a previous recipe

Ingredients:
7 ounces dark chocolate (this time I used Ghirardelli's 72% cocoa)
1/2 cup unsalted butter, cut into quarters
3 tablespoons cocoa powder
3 large eggs
1 cup granulated sugar
1 teaspoon vanilla extract
1 teaspoon peppermint extract
1/2 teaspoon table salt
1 cup flour

Directions:
1. Adjust oven rack to lower-middle position and heat oven to 350F degrees.
2. Spray mini muffin pan with nonstick vegetable cooking spray.
3. In microwave, melt chocolate and butter, stirring occasionally until mixture is smooth. Whisk in cocoa until smooth. Set aside to cool slightly.
4. Whisk together eggs, sugar, vanilla, peppermint, and salt in medium bowl until combined, about 15 seconds.
5. Whisk warm chocolate mixture into egg mixture; then stir in flour until just combined.
6. Spoon batter into muffin pan. Bake until slightly puffed and toothpick inserted in center comes out with a small amount of sticky crumbs clinging to it, 15 to 20 minutes. Cool on wire rack to room temperature.