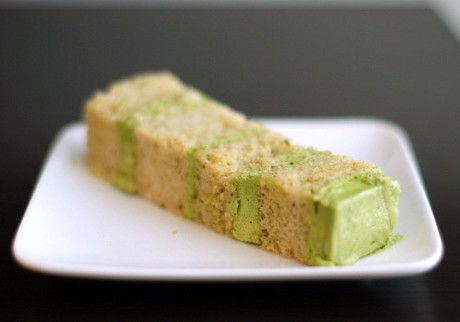
This month’s Daring Bakers was a bit of a doozy. Worth it? Yes. Delicious? Doubly yes. Thing is, it took a lot out of me. I sacrificed nights of going out to work on this lasagna. Okay, it was just one night. When Tim was out that night and people asked where I was, he had to respond, “Oh, she’s at home making a lasagna from scratch.” You can’t even make up an excuse like that, so everyone knows I’m just crazy.
I’ve made fresh pasta before, but I’ve never tried making spinach pasta. I read some key tips only after I ran into problems, so if you dare try this recipe, listen up. When the recipe calls for fresh spinach, it really means freshly cooked spinach. Throwing this in a blender or food processor prior to mixing in the dough also helps achieve a uniform green color. I did that after throwing in freshly cut raw spinach. That meant having extra spinach in my lasagna, which was fine by me. Second note, rolling pasta for lasagna is hard work. My hands and forearms were sore the next day, and I didn’t even roll my pasta as thin as recommended. The lasagna had a doughy texture because of this, so in the future I will either use a machine to make it or outsource that step to my strong husband.
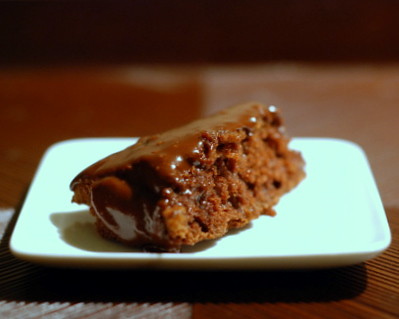
The other parts of the recipe weren’t so bad, just time consuming. Grinding meat, stewing sauce, making the béchamel sauce - a lot of love went into this dish. I’m sure a lot of love went into all the other Daring Bakers’ lasagnas too. Check out their experiences too.
The March 2009 challenge is hosted by Mary of Beans and Caviar, Melinda of Melbourne Larder and Enza of Io Da Grande. They have chosen Lasagne of Emilia-Romagna from The Splendid Table by Lynne Rossetto Kasper as the challenge.
All recipes below from The Splendid Table: Recipes from Emilia-Romagna, the Heartland of Northern Italian Food by Lynne Rossetto Kasper.
Lasagne of Emilia-Romagna (Lasagne Verdi al Forno)
Ingredients:
10 quarts salted water
1 recipe Spinach Pasta cut for lasagna (recipe follows) #1
1 recipe Bechamel Sauce (recipe follows) #2
1 recipe Country Style Ragu (recipe follows) #3
1 cup freshly grated Parmigiano-Reggiano
Directions:
1. Assembling the Ingredients
Have all the sauces, rewarmed gently over a medium heat, and the pasta at hand. Have a large perforated skimmer and a large bowl of cold water next to the stove. Spread a double thickness of paper towels over a large counter space. Preheat the oven to 350 degrees Fahrenheit. Oil or butter a 3 quart shallow baking dish
2. Cooking the Pasta
Bring the salted water to a boil. Drop about four pieces of pasta in the water at a time. Cook about 2 minutes. If you are using dried pasta, cook about 4 minutes, taste, and cook longer if necessary. The pasta will continue cooking during baking, so make sure it is only barely tender. Lift the lasagne from the water with a skimmer, drain, and then slip into the bowl of cold water to stop cooking. When cool, lift out and dry on the paper towels. Repeat until all the pasta is cooked.
3. Assembling the Lasagne
Spread a thin layer of béchamel over the bottom of the baking dish. Arrange a layer of about four overlapping sheets of pasta over the béchamel. Spread a thin layer of béchamel (about 3 or 4 spoonfuls) over the pasta, and then an equally thin layer of the ragu. Sprinkle with about 1 1/2 tablespoons of the béchamel and about 1/3 cup of the cheese. Repeat the layers until all ingredients are used, finishing with béchamel sauce and topping with a generous dusting of cheese
4. Baking and Serving the Lasagne
Cover the baking dish lightly with foil, taking care not to let it touch the top of the lasagne. Bake 40 minutes, or until almost heated through. Remove the foil and bake another 10 minutes, or until hot in the center (test by inserting a knife – if it comes out very warm, the dish is ready). Take care not to brown the cheese topping. It should be melted, creamy looking and barely tinged with a little gold. Turn off the oven, leave the door ajar and let the lasagne rest for about 10 minutes. Then serve. This is not a solid lasagne, but a moist one that slips a bit when it is cut and served.
5. Working Ahead
The ragu and the béchamel sauce can be made up to three days ahead. The ragu can also be frozen for up to one month. The pasta can be rolled out, cut and dried up to 24 hours before cooking. The assembled lasagne can wait at room temperature (20 degrees Celsius/68 degrees Fahrenheit) about 1 hour before baking. Do not refrigerate it before baking, as the topping of béchamel and cheese will overcook by the time the center is hot.
#1 Spinach Egg Pasta (Pasta Verde)
Ingredients:
2 jumbo eggs
10 ounces fresh spinach, rinsed dry, and finely chopped
3 1/2 cups all purpose unbleached flour
Directions
1. Mixing the dough:
Mound the flour in the center of your work surface and make a well in the middle. Add the eggs and spinach. Use a wooden spoon to beat together the eggs and spinach. Then gradually start incorporating shallow scrapings of flour from the sides of the well into the liquid. As you work more and more flour into the liquid, the well’s sides may collapse. Use a pastry scraper to keep the liquids from running off and to incorporate the last bits of flour into the dough. Don’t worry if it looks like a hopelessly rough and messy lump.
2. Kneading:
With the aid of the scraper to scoop up unruly pieces, start kneading the dough. Once it becomes a cohesive mass, use the scraper to remove any bits of hard flour on the work surface – these will make the dough lumpy. Knead the dough for about 3 minutes. Its consistency should be elastic and a little sticky. If it is too sticky to move easily, knead in a few more tablespoons of flour. Continue kneading about 10 minutes, or until the dough has become satiny, smooth, and very elastic. It will feel alive under your hands. Do not shortcut this step. Wrap the dough in plastic wrap, and let it relax at room temperature 30 minutes to 3 hours.
3. Stretching and Thinning:
If using an extra-long rolling pin work with half the dough at a time. With a regular-length rolling pin, roll out a quarter of the dough at a time and keep the rest of the dough wrapped. Lightly sprinkle a large work surface with flour. The idea is to stretch the dough rather than press down and push it. Shape it into a ball and begin rolling out to form a circle, frequently turning the disc of dough a quarter turn. As it thins outs, start rolling the disc back on the pin a quarter of the way toward the center and stretching it gently sideways by running the palms of your hands over the rolled-up dough from the center of the pin outward. Unroll, turn the disc a quarter turn, and repeat. Do twice more. Stretch and even out the center of the disc by rolling the dough a quarter of the way back on the pin. Then gently push the rolling pin away from you with one hand while holding the sheet in place on the work surface with the other hand. Repeat three more times, turning the dough a quarter turn each time.
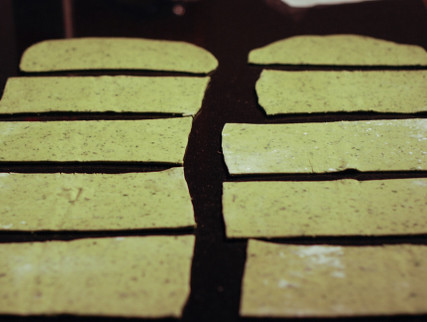
Repeat the two processes as the disc becomes larger and thinner. The goal is a sheet of even thickness. For lasagne, the sheet should be so thin that you can clearly see your hand through it and see colours. Cut into rectangles about 4 by 8 inches (10 x 20 cm).
Dry the pasta at room temperature and store in a sealed container or bag.
#2 Bechamel
Ingredients:
4 tablespoons unsalted butter
4 tablespoons all purpose unbleached flour
2 2/3 cups milk
Salt and freshly ground pepper to taste
Freshly grated nutmeg to taste
Directions:
Using a medium-sized saucepan, melt the butter over low to medium heat. Sift over the flour, whisk until smooth, and then stir (without stopping) for about 3 minutes. Whisk in the milk a little at a time and keep the mixture smooth. Bring to a slow simmer, and stir 3 to 4 minutes, or until the sauce thickens. Cook, stirring, for about 5 minutes, until the sauce thickens. Season with salt, pepper, and a hint of nutmeg.
#3 Country Style Ragu (Ragu alla Contadina)
Ingredients:
3 tablespoons extra virgin olive oil
2 ounces pancetta, finely chopped
1 medium onion, minced
1 medium stalk celery with leaves, minced
1 small carrot, minced
4 ounces boneless veal shoulder or round
4 ounces pork loin, trimmed of fat, or 4 ounces mild Italian sausage (made without fennel)
8 ounces beef skirt steak, hanging tender, or boneless chuck blade or chuck center cut (in order of preference)
1 ounce thinly sliced Prosciutto di Parma
2/3 cup dry red wine
1 1/2 cups chicken or beef stock
2 cups milk
3 canned plum tomatoes, drained
Salt and freshly ground black pepper to taste
Directions:
1. Heat the olive oil in a 12 inch skillet over medium-high heat. Have a large saucepan handy to use once browning is complete. Add the pancetta and minced vegetables and sauté, stirring frequently with a wooden spoon, 10 minutes, or until the onions barely begin to color. 2. Coarsely grind all the meats together, including the prosciutto, in a food processor or meat grinder. Stir into the pan and slowly brown over medium heat. First the meats will give off a liquid and turn dull grey but, as the liquid evaporates, browning will begin. Stir often, scooping under the meats with the wooden spatula. Protect the brown glaze forming on the bottom of the pan by turning the heat down. Cook 15 minutes, or until the meats are a deep brown. Turn the contents of the skillet into a strainer and shake out the fat. Turn them into the saucepan and set over medium heat.
3. Add the wine to the skillet, lowering the heat so the sauce bubbles quietly. Stir occasionally until the wine has reduced by half, about 3 minutes. Scrape up the brown glaze as the wine bubbles. Then pour the reduced wine into the saucepan and set the skillet aside.
4. Stir ½ cup stock into the saucepan and let it bubble slowly, 10 minutes, or until totally evaporated. Repeat with another ½ cup stock. Stir in the last 1/2 cup stock along with the milk. Adjust heat so the liquid bubbles very slowly. Partially cover the pot, and cook 1 hour. Stir frequently to check for sticking.
5. Add the tomatoes, crushing them as they go into the pot. Cook uncovered, at a very slow bubble for another 45 minutes, or until the sauce resembles a thick, meaty stew. Season with salt and pepper.
6. The ragu can be made 3 days ahead. Cover and refrigerate. It also freezes well for up to 1 month. Skim the fat from the ragu before using it.