
新年快樂! Happy Chinese New Year! I wish you all a prosperous year, and may your celebrations be filled with lots of food and warmth!
It's been terribly frigid here, and in the city that never sleeps, I'm still expected to go into work as long as the subways are running. Luckily my commute only involves strapping on my boots and walking (though with this week's weather, ice skates would have been more fitting).
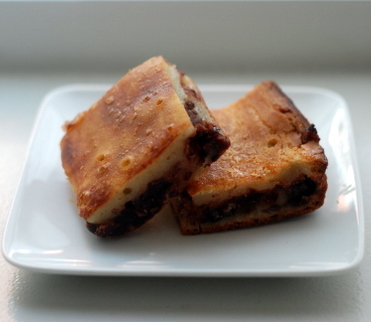
In these frosty conditions, nothing warms me up like food, friends, and family. Tonight we will feast on lots of Chinese food, and I'll be snacking on this azuki mochi throughout the day.
Tiny Urban Kitchen featured a post of Chinese New Year recipes, and the nian gao (年糕) post spoke to me. I love making (and eating) mochi, but I usually cook it using steam. So I thought I'd try out a baked mochi cake, stuffed with red bean paste. Thanks for the idea and the recipe, Jen!
If you haven't eaten anything like this before, think of it like a super-chewy-Asian-flavored-brownie. Or blondie. It's super easy to make, and even easier to eat!
Azuki (Red Bean) Filled Mochi
adapted from Tiny Urban Kitchen
Ingredients:
1 lb sweet rice flour
1 cup sugar
1/2 teaspoon salt
2 eggs, beaten
2 cups and 1 tablespoon milk
1 egg yolk, beaten
2 cups azuki (red bean) paste
Directions:
1. Preheat oven to 350 degrees F and grease a 9"x13" baking pan.
2. In a large bowl, mix together flour, sugar, salt.
3. Add 2 beaten eggs and 2 cups milk into flour mixture and stir together until well combined.
4. Spread about half of the mochi batter into greased baking pan. Spoon the azuki paste on top of mochi layer and spread evenly. Cover with remaining mochi batter.
5. Whisk together egg yolk and tablespoon of milk to make egg wash. Brush top of mochi with egg wash.
6. Bake in oven for 60 minutes until golden brown.
7. Let cool 10-15 minutes then slice into squares.
No comments:
Post a Comment