Showing posts with label Daring Bakers. Show all posts

Friday, December 25, 2009

Gingerbread Alamo


The December 2009 Daring Bakers’ challenge was brought to you by Anna of Very Small Anna and Y of Lemonpi. They chose to challengeDaring Bakers’ everywhere to bake and assemble a gingerbread house from scratch. They chose recipes from Good Housekeeping and from The Great Scandinavian Baking Book as the challenge recipes.
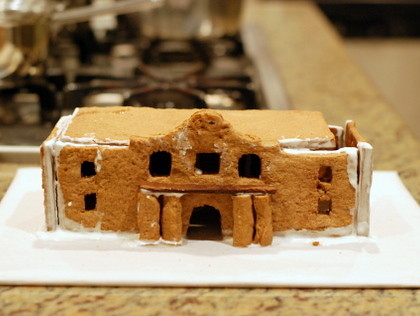
Merry Christmas from Texas! This year Tim and I are celebrating the birth of Jesus with my side of the family in Houston, and we've been having fun with our traditions of puzzle making, carol singing, and eating everything in sight. I took a break from the puzzles by making this gingerbread Alamo for this month's well-timed Daring Bakers' challenge.

I take no credit for the idea. Lisa of the Homesick Texan blogged about her gingerbread Alamo a few days ago, and I used her awesome templates for this challenge. Lisa and I have a few things in common: we reside in New York, home to us is Houston, our first gingerbread structure was made this year, and that structure would be the Alamo covered in snow. I'm actually headed to San Antonio this weekend, and I'll double check, but somehow I doubt it's covered in snow. Looking back, I should have used simple syrup instead of royal icing for the glue. Royal icing does not hide well.

I snacked on the bits of the gingerbread, and I was not a fan. It seemed to be too dry and lacked not only the chewy texture but some flavor as well. It made for a decent structure, but I would not recommend making it for taste.

I hope y'all had a wonderful Christmas today. I love the holiday because of its meaning and also for the quality time I get to spend with family. I'm off to get back to them and the puzzles!


Scandinavian Gingerbread (Pepparkakstuga)
from The Great Scandinavian Baking Book by Beatrice Ojakangas

Ingredients:
1 cup butter, room temperature
1 cup brown sugar, well packed
2 tablespoons cinnamon
4 teaspoons ground ginger
3 teaspoons ground cloves
2 teaspoons baking soda
1/2 cup boiling water
5 cups all-purpose flour
Gingerbread Alamo templates

Directions:
1. In a large bowl, cream the butter and sugar until blended. Add the cinnamon, ginger and cloves. Mix the baking soda with the boiling water and add to the dough along with the flour. Mix to make a stiff dough. If necessary add more water, a tablespoon at a time. Chill 2 hours or overnight.
2. When ready to bake, preheat oven to 375 degrees F.
3. Cut patterns for the Alamo: front, 4 sides, back, and roof.
4. Roll the dough out on a large, ungreased baking sheet and place the patterns on the dough.
5. Mark off the various pieces with a knife and cut shapes out of dough. Place on baking sheet and chill in refrigerator until dough hardens slightly, about 5-10 minutes.
6. Take baking sheet out of refrigerator and bake for 12 to 15 minutes until the cookie dough feels firm. After baking, trim edges to make straight if necessary. Let gingerbread completely cool before assembling.


Royal Icing
Ingredients:
1 large egg white
3 cups powdered sugar
1 teaspoon white vinegar
1 teaspoon almond extract

Directions:
1. Beat all liquid ingredients until smooth.
2. Add the powdered sugar gradually to get the desired consistency.


Assembling the Alamo
Directions:
1. Wrap a large piece of cardboard with parchment for the Alamo grounds.
2. Generally apply royal icing to bottom of the front Alamo wall, hold it in place on the parchment covered cardboard until it stands on its own.
3. Continue the process with the four side pieces (two go in the middle to support the roof) and the back. Let the royal icing dry on the Alamo.
4. Add the roof, generously applying more icing between cracks. Hold in place until dry, using cans if you have to.

Friday, November 27, 2009

Chocolate Hazelnut Cannoli


It may sound odd, but I don't really like cannoli. It's fried dough filled with sweet cheese, and yes, I've had authentic cannoli, but eating them never moved me in any way. So when I found out this month's Daring Bakers' Challenge was to make cannoli, I thought to myself, "Eh. I suppose I could make a batch for Thanksgiving dinner." And that is what I did. I made a batch for the Thanksgiving dinner I shared with my college roommates last Saturday. Those who like cannoli said they tasted great, so I will take their word for it. I enjoyed the chocolate-hazelnut flavor combination though it's not a traditional way to make cannoli.

Special thanks to my Italian co-worker who lent me her cannoli tubes that were only used once. I'm glad to have put more mileage on the tubes, but I doubt I will ever have a need for them again. Make cannoli from scratch? Check. Now I'll be moving on to more enjoyable recipes.
The November 2009 Daring Bakers Challenge was chosen and hosted by Lisa Michele of Parsley, Sage, Desserts and Line Drives. She chose the Italian Pastry, Cannolo (Cannoli is plural), using the cookbooks Lidia’s Italian-American Kitchen by Lidia Matticchio Bastianich and The Sopranos Family Cookbook by Allen Rucker; recipes by Michelle Scicolone, as ingredient/direction guides. She added her own modifications/changes, so the recipe is not 100% verbatim from either book.
Lidisano’s Cannoli
adapted from Lidia’s Italian-American Kitchen and The Sopranos Family Cookbook
makes 22-24 4-inch cannoli


Chocolate Cannoli Shells

Ingredients:
2 cups all-purpose flour
2 tablespoons sugar
1 teaspoon unsweetened baking cocoa powder
1/2 teaspoon ground cinnamon
1/2 teaspoon salt
3 tablespoons vegetable or olive oil
1 teaspoon white wine vinegar
approximately 1/2 cup sweet Marsala or any white or red wine you have on hand
1 large egg white
2 quarts vegetable oil for frying
1/4 cup melted dark chocolate for garnish
confectioners' sugar for garnish

Directions:
1. In the bowl of an electric stand mixer using the dough hook, combine the flour, sugar, cocoa, cinnamon, and salt. Stir in the oil, vinegar, and enough of the wine to make a soft dough. Turn the dough out onto a lightly floured surface and knead until smooth and well blended, about 2 minutes. Shape the dough into a ball. Cover with plastic wrap and let rest in the fridge from 2 hours to overnight.
2. Cut the dough into two pieces. Keep the remaining dough covered while you work. Lightly flour a large cutting or pastry board and roll the dough until super thin, about 1/16 to 1/8” thick (An area of about 13 inches by 18 inches should give you that). Cut out 3 to 5-inch circles. Roll the cut out circle into an oval, rolling it larger and thinner if it’s shrunk a little.
3. Oil the outside of the cannoli tubes for the first batch only. Roll a dough oval from the long side around each tube and dab a little egg white on the dough where the edges overlap. Press well to seal. Set aside to let the egg white seal dry a little.
4. In a deep heavy saucepan, pour enough oil to reach a depth of 3 inches, or if using an electric deep-fryer, follow the manufacturer's directions. Heat the oil to 375 degrees F on a deep fry thermometer, or until a small piece of the dough or bread cube placed in the oil sizzles and browns in 1 minute. Have ready a tray or sheet pan lined with paper towels or paper bags.
5. Carefully lower a few of the cannoli tubes into the hot oil. Do not crowd the pan. Fry the shells until golden, about 2 minutes, turning them so that they brown evenly.
6. Lift a cannoli tube with a wire skimmer or large slotted spoon, out of the oil. Using tongs, grasp the cannoli tube at one end. Very carefully remove the cannoli tube with the open sides straight up and down so that the oil flows back into the pan. Place the tube on paper towels or bags to drain. Repeat with the remaining tubes. While they are still hot, grasp the tubes with a potholder and pull the cannoli shells off the tubes with a pair of tongs, or with your hand protected by an oven mitt or towel. Let the shells cool completely on the paper towels. Place shells on cooling rack until ready to fill.
7. Repeat making and frying the shells with the remaining dough. If you are reusing the cannoli tubes, let them cool before wrapping them in the dough.


Cannoli Filling
Ingredients:
2 lbs ricotta cheese, strained
1 2/3 cups confectioner’s sugar, (more or less, depending on how sweet you want it), sifted
1/2 teaspoon ground cinnamon
1 teaspoon pure vanilla extract
3 tablespoons hazelnut praline paste

Directions:
1. Line a strainer with cheesecloth. Place the ricotta in the strainer over a bowl, and cover with plastic wrap and a towel. Weight it down with a heavy can, and let the ricotta drain in the refrigerator for several hours to overnight.
2. In a bowl with electric mixer, beat ricotta until smooth and creamy. Beat in confectioner’s sugar, cinnamon, vanilla and blend until smooth. Transfer to another bowl and stir in hazelnut praline paste until well mixed. Chill until firm. (The filling can be made up to 24 hours prior to filling the shells. Cover and keep refrigerated).


Assembling the Cannoli
1. Press or dip cannoli shells in melted chocolate and let dry before filling.
2. Fill a pastry bag fitted with a 1/2-inch plain or star tip (or use a Ziploc bag as substitution) with the ricotta cream. If using a Ziploc bag, cut about 1/2 inch off one corner. Insert the tip in the cannoli shell and squeeze gently until the shell is half filled. Turn the shell and fill the other side.
3. Dust with confectioner’s sugar and/or drizzles of melted chocolate if desired.

Tuesday, October 27, 2009

Caramel Apple Macarons


October's Daring Bakers' challenge was to make delicious macarons with the choice of flavoring and filling left up to us. Being that it's now fall and given I had over 10 pounds of apples from the apple picking trip I did couple weekends ago, I chose to make a vanilla macaron cookie filled with a caramel apple puree. My choice of filling became a collaboration of past Daring Bakers' challenges (namely the Danish Braid and Caramel Cake), and it was pretty fun to remake those recipes. My filling is more of a caramel flavored applesauce than I hoped for, so if you're looking for a creamy filling, you'll need to do some tweaking to my filling recipe. Perhaps a caramel apple buttercream?

These macarons didn't turn out as expected due to some over whipped egg whites. And like I've said before, this is not a quick recipe to breeze through. If I were to give a lesson in patience, I would assign the task of making macarons. The day I master the macaron will mark the day I become a patient woman. Or maybe not, we'll have to see about that one.
The 2009 October Daring Bakers’ challenge was brought to us by Ami S. She chose macarons from Claudia Fleming’s The Last Course: The Desserts of Gramercy Tavern as the challenge recipe.
Caramel Apple Macarons
adapted from Claudia Fleming’s The Last Course: The Desserts of Gramercy Tavern

Ingredients:
2 1/4 cups confectioners’ sugar
2 cups almond flour
2 tablespoons granulated sugar
5 egg whites (brought to room temperature)
1 vanilla bean, split and scraped

Directions:
1. Preheat the oven to 200°F. Put both the confectioners’ sugar and almond flour in a food processor or blender and grind until thoroughly combined.
2. Beat the egg whites in the clean dry bowl of a stand mixer until they hold soft peaks. Slowly add the granulated sugar and beat until the mixture holds stiff peaks.
3. Sift a third of the almond flour mixture into the meringue and fold gently to combine. Add seeds scraped from vanilla bean. If you are planning on adding other flavoring to the batter, now is the time. Sift in the remaining almond flour in two batches. Be gentle! Don’t over fold, but fully incorporate your ingredients.
4. Spoon the mixture into a pastry bag fitted with a plain half-inch tip. You can also use a Ziploc bag with a corner cut off. It’s easiest to fill your bag if you stand it up in a tall glass and fold the top down before spooning in the batter.
5. Pipe one-inch-sized mounds of batter onto a baking sheet lined with Silpat.
6. Bake the macaroon for 5 minutes. Remove the pan from the oven and raise the temperature to 375F degrees. Once the oven is up to temperature, put the pans back in the oven and bake for an additional 7 to 8 minutes, or lightly colored.
7. Cool on a rack before filling with caramel apple filling (recipe below).


Caramel Apple Filling

Ingredients:
1 cup sugar
1/4 cup water
1/2 cup water (for "stopping" the caramelizing process)
Apple Filling (recipe below)

Directions:
1. In a small stainless steel saucepan, with tall sides, mix water and sugar until mixture feels like wet sand. Brush down any stray sugar crystals with wet pastry brush. Turn on heat to highest flame. Cook until smoking slightly and color is a dark amber.
2. When color is achieved, very carefully pour in one cup of water. Caramel will jump and sputter about! It is very dangerous, so have long sleeves on and be prepared to step back.
3. Whisk over medium heat until it has reduced slightly and feels sticky between two fingers. Please wait for it to cool on a spoon before touching it. Note: For safety reasons, have ready a bowl of ice water to plunge your hands into if any caramel should land on your skin.
4. After caramel syrup has cooled, blend together with apple filling in a food processor or blender until mixture becomes a sticky puree.


Apple Filling

Ingredients:
1 apple, peeled, cored, and cut into 1/4-inch pieces
1 tablespoon sugar
1/4 teaspoon ground cinnamon
1 tablespoon unsalted butter

Directions:
1. Toss all ingredients except butter in a large bowl.
2. Melt the butter in a saute pan over medium heat until slightly nutty in color, about 6 - 8 minutes.
3. Add the apple mixture and saute until apples are softened and caramelized, 10 to 15 minutes.
4. Let cool to room temperature or cool in an ice bath.

Sunday, September 27, 2009

Breakfast Vol au Vent


Since I joined the Daring Bakers, this is the second time I've seen pastry dough incorporated into the challenge. Last year, the Danish Braid was my first tackle with pastry dough. Yes, it was a daunting task, but after making the Danish Braid, I felt like I could easily do it again. Well, I've done it again, but it wasn't exactly by choice. This month's Daring Bakers' Challenge was the French Vols Au Vent, made with our choice of filling. I chose to make a breakfast Vol au Vent, filled with an Italian sausage and egg scramble. I do love pastry dough, but because it's so time-consuming to make, it looks like I'll stick with only making it for Daring Bakers' Challenges.
The September 2009 Daring Bakers' challenge was hosted by Steph of A Whisk and a Spoon. She chose the French treat, Vols-au-Vent based on the Puff Pastry recipe by Michel Richard from the cookbook Baking With Julia by Dorie Greenspan.

Breakfast Vols Au Vent

Ingredients:
Chilled pastry dough (recipe below)
egg wash (1 egg or yolk beaten with a small amount of water)
Scrambled eggs cooked with Italian sausage

Directions:
1. Line a baking sheet with parchment and set aside.
2. Using a knife or metal bench scraper, divided your chilled puff pastry dough into three equal pieces. Work with one piece of the dough, and leave the rest wrapped and chilled.
3. On a lightly floured surface, roll the piece of dough into a rectangle about 1/8 to 1/4-inch thick. Transfer it to the baking sheet and refrigerate for about 10 minutes before proceeding with the cutting.
4. Using a ¾-inch cutter for small vols-au-vent, or a 2- to 2.5-inch round cutter for large, cut centers from half of the rounds to make rings. These rings will become the sides of the vols-au-vent, while the solid disks will be the bottoms. You can either save the center cut-outs to bake off as little “caps” for you vols-au-vent, or put them in the scrap pile.
5. Dock the solid bottom rounds with a fork (prick them lightly, making sure not to go all the way through the pastry) and lightly brush them with egg wash. Place the rings directly on top of the bottom rounds and very lightly press them to adhere. Brush the top rings lightly with egg wash, trying not to drip any down the sides (which may inhibit rise). If you are using the little “caps,” dock and egg wash them as well.
6. Refrigerate the assembled vols-au-vent on the lined baking sheet while you pre-heat the oven to 400ºF (200ºC). (You could also cover and refrigerate them for a few hours at this point.)
7. Once the oven is heated, remove the sheet from the refrigerator and place a silicon baking mat or another sheet of parchment over top of the shells. This will help them rise evenly. Bake the shells until they have risen and begin to brown, about 10-15 minutes depending on their size. Reduce the oven temperature to 350ºF (180ºC), and remove the silicon mat or parchment sheet from the top of the vols-au-vent. If the centers have risen up inside the vols-au-vent, you can gently press them down. Remove the sheet on top and continue baking until the layers are golden, about 15-20 minutes more.
8. Remove to a rack to cool. Cool to room temperature for cold fillings or to warm for hot fillings.
9. Fill with eggs and sausage and serve.
Note: Although they are at their best filled and eaten soon after baking, baked vols-au-vent shells can be stored airtight for a day. Shaped, unbaked vols-au-vent can be wrapped and frozen for up to a month (bake from frozen, egg-washing them first).


Michel Richard’s Puff Pastry Dough
from Baking with Julia by Dorie Greenspan
yields 2-1/2 pounds dough

Ingredients:
2 1/2 cups unbleached all-purpose flour
1 1/4 cups (5.0 oz/ 142 g) cake flour
1 tablespoon salt
1 1/4 cups ice water
1 pound very cold unsalted butter
extra flour for dusting work surface

Directions:
Mixing the Dough
1. Check the capacity of your food processor before you start. If it cannot hold the full quantity of ingredients, make the dough into two batches and combine them.
2. Put the all-purpose flour, cake flour, and salt in the work bowl of a food processor fitted with a metal blade and pulse a couple of times just to mix. Add the water all at once, pulsing until the dough forms a ball on the blade. The dough will be very moist and pliable and will hold together when squeezed between your fingers.
3. Remove the dough from the machine, form it into a ball, with a small sharp knife, slash the top in a tic-tac-toe pattern. Wrap the dough in a damp towel and refrigerate for about 5 minutes. Meanwhile, place the butter between 2 sheets of plastic wrap and beat it with a rolling pin until it flattens into a square that's about 1" thick. Take care that the butter remains cool and firm: if it has softened or become oily, chill it before continuing.

Incorporating the Butter
1. Unwrap the dough and place it on a work surface dusted with all-purpose flour with your rolling pin, press on the dough to flatten it and then roll it into a 10" square. Keep the top and bottom of the dough well floured to prevent sticking and lift the dough and move it around frequently. Starting from the center of the square, roll out over each corner to create a thick center pad with "ears," or flaps.
2. Place the cold butter in the middle of the dough and fold the ears over the butter, stretching them as needed so that they overlap slightly and encase the butter completely. (If you have to stretch the dough, stretch it from all over; don't just pull the ends) you should now have a package that is 8" square.
3. To make great puff pastry, it is important to keep the dough cold at all times. There are specified times for chilling the dough, but if your room is warm, or you work slowly, or you find that for no particular reason the butter starts to ooze out of the pastry, cover the dough with plastic wrap and refrigerate it . You can stop at any point in the process and continue at your convenience or when the dough is properly chilled.

Making the Turns
1. Gently but firmly press the rolling pin against the top and bottom edges of the square (this will help keep it square). Then, keeping the work surface and the top of the dough well floured to prevent sticking, roll the dough into a rectangle that is three times as long as the square you started with, about 24". With this first roll, it is particularly important that the butter be rolled evenly along the length and width of the rectangle; check when you start rolling that the butter is moving along well, and roll a bit harder or more evenly, if necessary, to get a smooth, even dough-butter sandwich.
2. With a pastry brush, brush off the excess flour from the top of the dough, and fold the rectangle up from the bottom and down from the top in thirds, like a business letter, brushing off the excess flour. You have completed one turn.
3. Rotate the dough so that the closed fold is to your left, like the spine of a book. Repeat the rolling and folding process, rolling the dough to a length of 24" and then folding it in thirds. This is the second turn.

Chilling the Dough
1. If the dough is still cool and no butter is oozing out, you can give the dough another two turns now. If the condition of the dough is iffy, wrap it in plastic wrap and refrigerate it for at least 30 minutes. Each time you refrigerate the dough, mark the number of turns you've completed by indenting the dough with your fingertips. It is best to refrigerate the dough for 30 to 60 minutes between each set of two turns.
2. The total number of turns needed is six. If you prefer, you can give the dough just four turns now, chill it overnight, and do the last two turns the next day. Puff pastry is extremely flexible in this regard. However, no matter how you arrange your schedule, you should plan to chill the dough for at least an hour before cutting or shaping it.

Monday, July 27, 2009

Peppermint Dark Chocolate Milan Cookies


I've definitely eaten my share of store-bought cookies as a kid. I ate them all day, in school lunches to afternoon snacks, and even for breakfast. Yes, breakfast. My mom was the type to give me birthday cake and Rice Krispies Treats for breakfast, because, you know, they're just pastries. I've changed my habits since then, but I still don't see the difference between having birthday cake for breakfast versus having multiple jelly-filled chocolate-glazed doughnuts for breakfast.

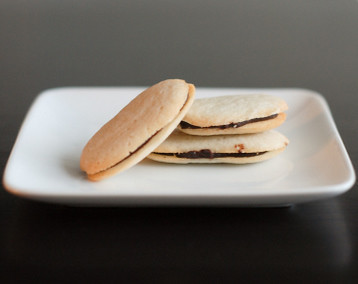
Back then, my favorite breakfast cookie was the Pepperidge Farm Milano Cookie. I was psyched to see that this month's Daring Bakers' Challenge was to recreate this classic cookie! The recipe called for a lighter orange flavored chocolate filling, but I mixed things up with a peppermint dark chocolate filling. The recipe was so easy, resulting in a cookie so decadent. Try having them for breakfast next time. It's okay, because Mom says so.
The July Daring Bakers' challenge was hosted by Nicole at Sweet Tooth. She chose Chocolate Covered Marshmallow Cookies and Milan Cookies from pastry chef Gale Gand of the Food Network.
Peppermint Milan Cookies
adapted from Food Network

Ingredients:
12 tablespoons unsalted butter, softened
2 1/2 cups powdered sugar
7/8 cup egg whites (from about 6 eggs)
2 tablespoons vanilla extract
1 1/2 cups all purpose flour

For the cookie filling:
1/2 cup heavy cream
8 ounces dark chocolate, chopped
1 teaspoon peppermint extract

Directions:
1. In a mixer with paddle attachment cream the butter and the sugar.
2. Add the egg whites gradually and then mix in the vanilla extract.
3. Add the flour and mix until just well mixed.
4. With a small (1/4-inch) plain tip, pipe 1-inch sections of batter onto a parchment-lined sheet pan, spacing them 2 inches apart as they spread.
5. Bake in a preheated 350 F degree oven for 10 minutes or until light golden brown around the edges. Let cool on the pan.
6. While waiting for the cookies to cool, in a small saucepan over medium flame, scald cream.
7. Pour hot cream over chocolate in a bowl, whisk to melt chocolate, add peppermint extract and blend well.
8. Set aside to cool (the mixture will thicken as it cools).
9. Spread a thin amount of the filling onto the flat side of a cookie while the filling is still soft and press the flat side of a second cookie on top.
10. Repeat with the remainder of the cookies.

Saturday, June 27, 2009

Bakewell Tart/Pudding


The June Daring Bakers' challenge was hosted by Jasmine of Confessions of a Cardamom Addict and Annemarie of Ambrosia and Nectar. They chose a Traditional (UK) Bakewell Tart... er... pudding that was inspired by a rich baking history dating back to the 1800's in England.

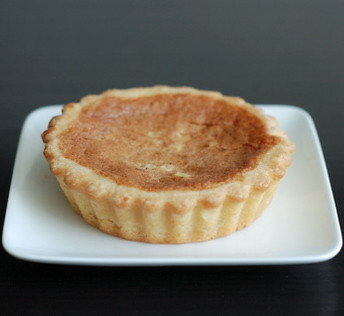
When I saw that this month's Daring Bakers' challenge was a tart, I laughed out loud. I had plenty of practice making tarts last month, so I sure was ready for this challenge! This recipe sounded delicious as I love anything almond flavored, and this tart had almond both in the pastry dough as well as in the frangipane. Some call this a tart, some call it a pudding, I would actually call it a cake-tart. The frangipane did turn out semi-spongy, but I couldn't see any resemblance to a pudding. Whatever you wish to name it, it paired mighty well with both blueberry preserves and Nutella.

Thanks, Jasmine (Confessions of a Cardamom Addict) and Annemarie (Ambrosia and Nectar) for hosting this month!


Bakewell Tart/Pudding


Ingredients:
Sweet shortcrust pastry (recipe below)
Frangipane (recipe below)
1 cup blueberry preserves OR 1 cup Nutella, warmed
Bench flour

Directions:
1. Place the chilled dough disc on a lightly floured surface. If it's overly cold, you will need to let it become acclimatized for about 15 minutes before you roll it out. Flour the rolling pin and roll the pastry to ¼ inch thickness, by rolling in one direction only (start from the center and roll away from you), and turning the disc a quarter turn after each roll.
2. When the pastry is to the desired size and thickness, transfer it to the tart pan, press in and trim the excess dough. Patch any holes, fissures or tears with trimmed bits. Chill in the freezer for 15 minutes.
3. Preheat oven to 400 F degrees.
4. Remove shell from freezer, spread as even a layer as you can of preserves or Nutella onto the pastry base. Top with frangipane, spreading to cover the entire surface of the tart.
5. Smooth the top and put into the oven for 30 minutes. Five minutes before the tart is done, the top will be brownish. Remove from oven and strew flaked almonds on top and return to the heat for the last five minutes of baking.
6. The finished tart will have a golden crust and the frangipane will be tanned and a bit spongy-looking. Remove from the oven and cool on the counter. Serve warm, with crème fraîche, whipped cream or custard sauce if you wish.


Sweet Shortcrust Pastry
Ingredients:
1 cup flour
2 tablespoons sugar
½ tsp salt
1/2 cup unsalted butter, cold
2 egg yolks
1/2 teaspoons almond extract
1-2 tablespoons cold water

Directions:
1. Sift together flour, sugar and salt.
2. Grate butter into the flour mixture, using the large hole-side of a box grater. Using your finger tips only, and working very quickly, rub the fat into the flour until the mixture resembles bread crumbs. Set aside.
3. Lightly beat the egg yolks with the almond extract and quickly mix into the flour mixture. Keep mixing while dribbling in the water, only adding enough to form a cohesive and slightly sticky dough.
4. Form the dough into a disc, wrap in cling and refrigerate for at least 30 minutes.


Frangipane
Ingredients:
9 tablespoons unsalted butter, softened
1/2 cup icing sugar
3 eggs
1/2 teaspoons almond extract
1/2 cup ground almonds
2 tablespoons flour

Directions:
1. Cream butter and sugar together for about a minute or until the mixture is primrose in color and very fluffy.
2. Scrape down the side of the bowl and add the eggs, one at a time, beating well after each addition. The batter may appear to curdle, but that's alright.
3. After beating the eggs in, pour in the almond extract and mix for about another 30 seconds and scrape down the sides again.
4. With the beaters on, spoon in the ground nuts and the flour. Mix well. The mixture will be soft, keep its slightly curdled look and retain its pallid yellow color.

Friday, April 24, 2009

Strawberry Cheesecake


I'm still in St. Thomas where my sister-in-law just got married, and what a gorgeous wedding it was. She certainly made a beautiful bride in her lovely Vera Wang dress, and the scenery at Villa Botanica was perfect. It's a little ironic I'm writing about her in this post because not only does she have a traumatic cheesecake story, but she's allergic to strawberries. It's sad, and I wish she could have enjoyed this me. (I've briefly mentioned her story before, and it involves a sincere attempt at cheesecake using cheddar cheese.)

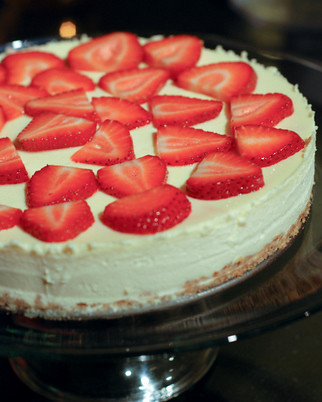
This month's Daring Bakers challenge was a bit easier than the previous ones, and I kept things fairly simple. The strawberry topping was an easy addition to a plain cheesecake, and it made for a classic dessert that Tim certainly enjoyed. He said he loved the creaminess of the cheesecake, but I'd say it was a bit too dense for my taste. I recently had my first taste of Eileen's Special Cheesecake, and I absolutely loved the light and airy texture of Eileen's.

I once said that I'm not really a cheesecake fan, but all this exposure to cheesecake is changing that. Perhaps I'll continue to make them as my inclination towards them grows. Tim, you'd like that now, wouldn't you?
The April 2009 challenge is hosted by Jenny from Jenny Bakes. She has chosen Abbey's Infamous Cheesecake as the challenge.
Strawberry Cheesecake
adapted from Abbey's Cheesecake

Crust Ingredients:
2 cups graham cracker crumbs
1/2 cup butter, melted
2 tablespoon sugar
1 teaspoon vanilla extract

Cheesecake Ingredients:
24 oz cream cheese, room temperature
1 cup sugar
3 large eggs
1 cup heavy cream
1 tablespoon lemon juice
1 tablespoon vanilla extract
1 tablespoon Cointreau (optional)

Topping Ingredients:
1 pint strawberries, cleaned and stemmed
1/4 cup sugar
1 teaspoon vanilla

Directions:
1. Preheat oven to 350 degrees F. Begin to boil a large pot of water for the water bath.
2. Mix together the crust ingredients and press into a springform pan. Set crust aside.
3. Combine cream cheese and sugar in the bowl of a stand-mixer and cream together until smooth. Add eggs, one at a time, fully incorporating each before adding the next. Make sure to scrape down the bowl in between each egg. Add heavy cream, vanilla, lemon juice, and Cointreau and blend until smooth and creamy.
4. Pour batter into prepared crust and tap the pan on the counter a few times to bring all air bubbles to the surface. Place pan into a larger pan and pour boiling water into the larger pan until halfway up the side of the cheesecake pan. If cheesecake pan is not airtight, cover bottom securely with foil before adding water.
5. Bake 45 to 55 minutes, until it is almost done - this can be hard to judge, but you're looking for the cake to hold together, but still have a lot of jiggle to it in the center. You don't want it to be completely firm at this stage. Close the oven door, turn the heat off, and let rest in the cooling oven for one hour. This lets the cake finish cooking and cool down gently enough so that it won't crack on the top. After one hour, remove cheesecake from oven and lift carefully out of water bath. Let it finish cooling on the counter.
6. Chop 1/3 pint strawberries in small pieces.
7. In a saucepan over medium heat, combine cut strawberries, sugar, and vanilla. Cook, stirring occasionally, until sauce thickens, about 5 minutes. Remove from heat and puree in a blender to make a sauce.
8. Slice the remaining strawberries, and combine into sauce. Decorate top of cheesecake with strawberries, and then cover and put in the fridge to chill. Once fully chilled, it is ready to serve.

Sunday, March 29, 2009

Lasagne Verdi al Forno


This month’s Daring Bakers was a bit of a doozy. Worth it? Yes. Delicious? Doubly yes. Thing is, it took a lot out of me. I sacrificed nights of going out to work on this lasagna. Okay, it was just one night. When Tim was out that night and people asked where I was, he had to respond, “Oh, she’s at home making a lasagna from scratch.” You can’t even make up an excuse like that, so everyone knows I’m just crazy.

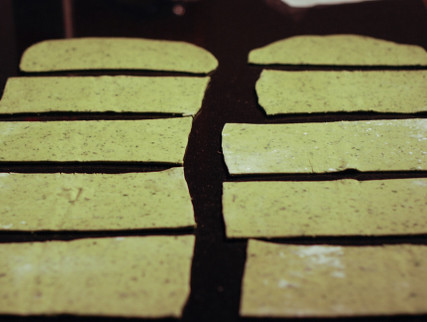
I’ve made fresh pasta before, but I’ve never tried making spinach pasta. I read some key tips only after I ran into problems, so if you dare try this recipe, listen up. When the recipe calls for fresh spinach, it really means freshly cooked spinach. Throwing this in a blender or food processor prior to mixing in the dough also helps achieve a uniform green color. I did that after throwing in freshly cut raw spinach. That meant having extra spinach in my lasagna, which was fine by me. Second note, rolling pasta for lasagna is hard work. My hands and forearms were sore the next day, and I didn’t even roll my pasta as thin as recommended. The lasagna had a doughy texture because of this, so in the future I will either use a machine to make it or outsource that step to my strong husband.

The other parts of the recipe weren’t so bad, just time consuming. Grinding meat, stewing sauce, making the béchamel sauce - a lot of love went into this dish. I’m sure a lot of love went into all the other Daring Bakers’ lasagnas too. Check out their experiences too.

The March 2009 challenge is hosted by Mary of Beans and Caviar, Melinda of Melbourne Larder and Enza of Io Da Grande. They have chosen Lasagne of Emilia-Romagna from The Splendid Table by Lynne Rossetto Kasper as the challenge.

All recipes below from The Splendid Table: Recipes from Emilia-Romagna, the Heartland of Northern Italian Food by Lynne Rossetto Kasper.


Lasagne of Emilia-Romagna (Lasagne Verdi al Forno)

Ingredients:
10 quarts salted water
1 recipe Spinach Pasta cut for lasagna (recipe follows) #1
1 recipe Bechamel Sauce (recipe follows) #2
1 recipe Country Style Ragu (recipe follows) #3
1 cup freshly grated Parmigiano-Reggiano

Directions:
1. Assembling the Ingredients
Have all the sauces, rewarmed gently over a medium heat, and the pasta at hand. Have a large perforated skimmer and a large bowl of cold water next to the stove. Spread a double thickness of paper towels over a large counter space. Preheat the oven to 350 degrees Fahrenheit. Oil or butter a 3 quart shallow baking dish
2. Cooking the Pasta
Bring the salted water to a boil. Drop about four pieces of pasta in the water at a time. Cook about 2 minutes. If you are using dried pasta, cook about 4 minutes, taste, and cook longer if necessary. The pasta will continue cooking during baking, so make sure it is only barely tender. Lift the lasagne from the water with a skimmer, drain, and then slip into the bowl of cold water to stop cooking. When cool, lift out and dry on the paper towels. Repeat until all the pasta is cooked.
3. Assembling the Lasagne
Spread a thin layer of béchamel over the bottom of the baking dish. Arrange a layer of about four overlapping sheets of pasta over the béchamel. Spread a thin layer of béchamel (about 3 or 4 spoonfuls) over the pasta, and then an equally thin layer of the ragu. Sprinkle with about 1 1/2 tablespoons of the béchamel and about 1/3 cup of the cheese. Repeat the layers until all ingredients are used, finishing with béchamel sauce and topping with a generous dusting of cheese
4. Baking and Serving the Lasagne
Cover the baking dish lightly with foil, taking care not to let it touch the top of the lasagne. Bake 40 minutes, or until almost heated through. Remove the foil and bake another 10 minutes, or until hot in the center (test by inserting a knife – if it comes out very warm, the dish is ready). Take care not to brown the cheese topping. It should be melted, creamy looking and barely tinged with a little gold. Turn off the oven, leave the door ajar and let the lasagne rest for about 10 minutes. Then serve. This is not a solid lasagne, but a moist one that slips a bit when it is cut and served.
5. Working Ahead
The ragu and the béchamel sauce can be made up to three days ahead. The ragu can also be frozen for up to one month. The pasta can be rolled out, cut and dried up to 24 hours before cooking. The assembled lasagne can wait at room temperature (20 degrees Celsius/68 degrees Fahrenheit) about 1 hour before baking. Do not refrigerate it before baking, as the topping of béchamel and cheese will overcook by the time the center is hot.


#1 Spinach Egg Pasta (Pasta Verde)

Ingredients:
2 jumbo eggs
10 ounces fresh spinach, rinsed dry, and finely chopped
3 1/2 cups all purpose unbleached flour

Directions
1. Mixing the dough:
Mound the flour in the center of your work surface and make a well in the middle. Add the eggs and spinach. Use a wooden spoon to beat together the eggs and spinach. Then gradually start incorporating shallow scrapings of flour from the sides of the well into the liquid. As you work more and more flour into the liquid, the well’s sides may collapse. Use a pastry scraper to keep the liquids from running off and to incorporate the last bits of flour into the dough. Don’t worry if it looks like a hopelessly rough and messy lump.
2. Kneading:
With the aid of the scraper to scoop up unruly pieces, start kneading the dough. Once it becomes a cohesive mass, use the scraper to remove any bits of hard flour on the work surface – these will make the dough lumpy. Knead the dough for about 3 minutes. Its consistency should be elastic and a little sticky. If it is too sticky to move easily, knead in a few more tablespoons of flour. Continue kneading about 10 minutes, or until the dough has become satiny, smooth, and very elastic. It will feel alive under your hands. Do not shortcut this step. Wrap the dough in plastic wrap, and let it relax at room temperature 30 minutes to 3 hours.
3. Stretching and Thinning:
If using an extra-long rolling pin work with half the dough at a time. With a regular-length rolling pin, roll out a quarter of the dough at a time and keep the rest of the dough wrapped. Lightly sprinkle a large work surface with flour. The idea is to stretch the dough rather than press down and push it. Shape it into a ball and begin rolling out to form a circle, frequently turning the disc of dough a quarter turn. As it thins outs, start rolling the disc back on the pin a quarter of the way toward the center and stretching it gently sideways by running the palms of your hands over the rolled-up dough from the center of the pin outward. Unroll, turn the disc a quarter turn, and repeat. Do twice more. Stretch and even out the center of the disc by rolling the dough a quarter of the way back on the pin. Then gently push the rolling pin away from you with one hand while holding the sheet in place on the work surface with the other hand. Repeat three more times, turning the dough a quarter turn each time.
Repeat the two processes as the disc becomes larger and thinner. The goal is a sheet of even thickness. For lasagne, the sheet should be so thin that you can clearly see your hand through it and see colours. Cut into rectangles about 4 by 8 inches (10 x 20 cm).
Dry the pasta at room temperature and store in a sealed container or bag.


#2 Bechamel

Ingredients:
4 tablespoons unsalted butter
4 tablespoons all purpose unbleached flour
2 2/3 cups milk
Salt and freshly ground pepper to taste
Freshly grated nutmeg to taste

Directions:
Using a medium-sized saucepan, melt the butter over low to medium heat. Sift over the flour, whisk until smooth, and then stir (without stopping) for about 3 minutes. Whisk in the milk a little at a time and keep the mixture smooth. Bring to a slow simmer, and stir 3 to 4 minutes, or until the sauce thickens. Cook, stirring, for about 5 minutes, until the sauce thickens. Season with salt, pepper, and a hint of nutmeg.


#3 Country Style Ragu (Ragu alla Contadina)

Ingredients:
3 tablespoons extra virgin olive oil
2 ounces pancetta, finely chopped
1 medium onion, minced
1 medium stalk celery with leaves, minced
1 small carrot, minced
4 ounces boneless veal shoulder or round
4 ounces pork loin, trimmed of fat, or 4 ounces mild Italian sausage (made without fennel)
8 ounces beef skirt steak, hanging tender, or boneless chuck blade or chuck center cut (in order of preference)
1 ounce thinly sliced Prosciutto di Parma
2/3 cup dry red wine
1 1/2 cups chicken or beef stock
2 cups milk
3 canned plum tomatoes, drained
Salt and freshly ground black pepper to taste

Directions:
1. Heat the olive oil in a 12 inch skillet over medium-high heat. Have a large saucepan handy to use once browning is complete. Add the pancetta and minced vegetables and sauté, stirring frequently with a wooden spoon, 10 minutes, or until the onions barely begin to color. 2. Coarsely grind all the meats together, including the prosciutto, in a food processor or meat grinder. Stir into the pan and slowly brown over medium heat. First the meats will give off a liquid and turn dull grey but, as the liquid evaporates, browning will begin. Stir often, scooping under the meats with the wooden spatula. Protect the brown glaze forming on the bottom of the pan by turning the heat down. Cook 15 minutes, or until the meats are a deep brown. Turn the contents of the skillet into a strainer and shake out the fat. Turn them into the saucepan and set over medium heat.
3. Add the wine to the skillet, lowering the heat so the sauce bubbles quietly. Stir occasionally until the wine has reduced by half, about 3 minutes. Scrape up the brown glaze as the wine bubbles. Then pour the reduced wine into the saucepan and set the skillet aside.
4. Stir ½ cup stock into the saucepan and let it bubble slowly, 10 minutes, or until totally evaporated. Repeat with another ½ cup stock. Stir in the last 1/2 cup stock along with the milk. Adjust heat so the liquid bubbles very slowly. Partially cover the pot, and cook 1 hour. Stir frequently to check for sticking.
5. Add the tomatoes, crushing them as they go into the pot. Cook uncovered, at a very slow bubble for another 45 minutes, or until the sauce resembles a thick, meaty stew. Season with salt and pepper.
6. The ragu can be made 3 days ahead. Cover and refrigerate. It also freezes well for up to 1 month. Skim the fat from the ragu before using it.

Saturday, February 28, 2009

Chocolate Valentino Cake and Black Peppercorn Ice Cream


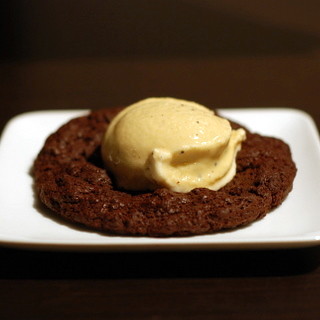
February has reached its end, and that means it's time for another round with the Daring Bakers. This month we were to make a flourless chocolate cake and pair it with a homemade ice cream, and I'm afraid my cake turned out to be a flop, literally. I was impatient in waiting for the egg whites to form stiff peaks, and I went ahead and folded in the soft-whipped egg whites. My "cake" turned out to be one giant dark chocolate cookie. Fortunately, it tasted just fine, as as Wendy and Dharm mentioned, it tasted exactly like the chocolate used.

Making the ice cream was a complete experiment for me. I've never made ice cream before (frozen yogurt - yes, just not ice cream), but I was determined to make a peppercorn ice cream to pair with the dark chocolate cake. I used a recipe for pink peppercorn ice cream and substituted in black peppercorns, and I was pleased with the results.

I would eat neither the cake nor the ice cream on its own, but when eaten together, it truly is perfect harmony. Tim even described it as a very "adult taste." Whatever he meant by that, I'll take it as a complement.

The February 2009 challenge is hosted by Wendy of WMPE's blog and Dharm of Dad ~ Baker & Chef.
We have chosen a Chocolate Valentino cake by Chef Wan; a Vanilla Ice Cream recipe from Dharm and a Vanilla Ice Cream recipe from Wendy as the challenge.


Chocolate Valentino Cake

Ingredients:
10 ounces 100% cacao Ghirardelli chocolate
6 ounces 72% cacao Ghirardelli chocolate
1/2 cup plus 2 tablespoons unsalted butter
5 large eggs, separated

Directions:
1. Put chocolate and butter in a heatproof bowl and set over a pan of simmering water (the bottom of the bowl should not touch the water) and melt, stirring often.
2. While your chocolate butter mixture is cooling. Butter your pan and line with a parchment circle then butter the parchment.
3. Separate the egg yolks from the egg whites and put into two medium/large bowls.
4. Whip the egg whites in a medium/large grease free bowl until stiff peaks are formed.
5. With the same beater beat the egg yolks together.
6. Add the egg yolks to the cooled chocolate.
7. Fold in 1/3 of the egg whites into the chocolate mixture and follow with remaining 2/3rds. Fold until no white remains without deflating the batter.
8. Pour batter into prepared pan, the batter should fill the pan 3/4 of the way full, and bake at 375 degrees F.
9. Bake for 25 minutes until an instant read thermometer reads 140 degrees F.
10. Cool cake on a rack for 10 minutes then unmold.


Black Peppercorn Ice Cream
recipe adapted from Chika Tillman

Ingredients:
2 cups heavy cream
2 cups whole milk
3/4 cup granulated sugar
1 tablespoon whole black peppercorns, crushed
8 egg yolks

Directions:
1. Heat the heavy cream, milk, sugar, and pepper in a medium saucepan over medium heat. Bring mixture to a simmer, stirring occasionally to dissolve the sugar.
2. Remove from heat and let mixture steep for 20 minutes. Meanwhile, place the egg yolks in a medium mixing bowl and beat well with a wire whisk.
3. Return the cream mixture to medium heat and bring to a simmer again. Remove from heat. Temper the hot mixture into the eggs by slowly pouring the cream into them in a thin stream, while constantly whisking the eggs with a whisk.
4. Strain the egg-and-cream mixture through a fine-mesh strainer back into the saucepan. Return it to the stove and cook over medium-low heat, stirring often with a wooden spoon, until the custard base has thickened enough to coat the back of the spoon.
5. Cool the custard in an ice bath until it is completely cold.
6. Freeze the custard in an ice cream maker, according to the manufacturer’s instructions. Place in a covered plastic container and store in the freezer overnight.

Wednesday, January 28, 2009

Tuile and Lychee Panna Cotta with Raspberry Puree


Happy New Year! Either I'm very late in saying that or I'm still celebrating the Lunar New Year, you can decide which it is. January certainly flew by for me, and I'm still surprised that my Daring Bakers post is already due. After returning from our marvelous trip out east, I've come back with much more flavor inspiration for my baking this year. Be on the lookout for more exotic desserts in 2009.

A little about tuiles: traditionally, tuiles are thin, crisp almond cookies that are gently molded over a rolling pin or arched form while they are still warm. Once set, their shape resembles the curved French roofing tiles for which they're named. The Dutch angle is that this batter was used to bake flat round cookies on December 31st, representing the year unfold. On New Years day, the same batter was used, but this day they were presented to well-wishers shaped as cigars and filled with whipped cream, symbolizing the New Year that's about to roll on.

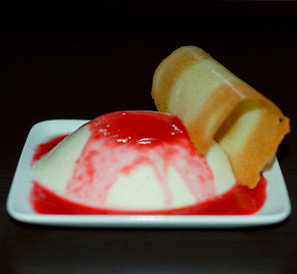
In this Daring Bakers' challenge, we were to pair the tuiles up with something light, and I thought of panna cotta after one dinner last week. I decided to add some fruit to it, flavoring the panna cotta with lychee puree and adding raspberry puree as a garnish. The flavors went wonderfully together, and the tuiles were the perfect finish to the dessert.

This month's challenge is brought to us by Karen of Baking Soda and Zorra of 1x umruehren bitte aka Kochtopf. They have chosen Tuiles from The Chocolate Book by Angélique Schmeink and Nougatine and Chocolate Tuiles from Michel Roux.

Tuiles
from Angélique Schmeinck's The Chocolate Book

Ingredients:
1/4 cup softened butter
1/2 cup sifted confectioner’s sugar
1 teaspoon sugar
dash of vanilla extract
2 large egg whites (slightly whisked)
1/2 cup sifted all purpose flour

Directions:
1. Preheat oven to 350F degrees.
2. Using a hand whisk or a stand mixer fitted with the paddle (low speed) and cream butter, sugar, and vanilla to a paste. Keep stirring while you gradually add the egg whites. Continue to add the flour in small batches and stir to achieve a homogeneous and smooth batter/paste. Be careful to not over mix.
3. Cover the bowl with plastic wrap and chill in the fridge for at least 30 minutes to firm up. (This batter will keep in the fridge for up to a week, take it out 30 minutes before you plan to use it).
4. Line a baking sheet with Silpat mat and chill in the fridge for at least 15 minutes. This will help spread the batter more easily if using a stencil. Press the stencil on the baking sheet and use an off sided spatula to spread batter. If foregoing the stencil, use a rubber spatula or piping bag and spread/pipe batter in desired shapes, making sure to leave room in between shapes.
5. Bake in preheated oven for about 5-10 minutes or until the edges turn golden brown. Immediately release from baking sheet and proceed to shape/bend the cookies in the desired shape. These cookies have to be shaped when still warm.


Lychee Panna Cotta
adapted from Gourmet, August 1997

Ingredients:
1 envelope unflavored gelatin (about 1 tablespoon)
2 tablespoons cold water
2 cups heavy cream
1/3 cup milk
3/4 cup sugar
2 cups lychee puree (from 2 cans canned lychee)

Directions:
1. In a very small saucepan sprinkle gelatin over water and let stand about 1 minute to soften. Heat gelatin mixture over low heat until gelatin is dissolved and remove pan from heat.
2. In a large saucepan bring cream, milk, and sugar just to a boil over moderately high heat, stirring. Remove pan from heat and stir in gelatin mixture and lychee puree. Divide cream mixture among eight 1/2-cup ramekins and cool to room temperature. Chill ramekins, covered, at least 4 hours or overnight.
3. Dip ramekins, one at a time, into a bowl of hot water 3 seconds. Run a thin knife around edge of each ramekin and invert ramekin onto center of a small plate.
4. Garnish the panna cotta with raspberry puree and tuile.


Raspberry Puree

Ingredients:
1/2 cup fresh raspberries
1/2 teaspoon sugar
drop of lemon juice

Directions:
1. Using a food processor or blender, blend raspberries, sugar, and lemon juice until it becomes a puree.
2. Strain puree through a cheesecloth, discarding the seeds.

Saturday, November 29, 2008

Caramel Cake (and Happy Birthday Tim)


After skipping last month's Daring Bakers' challenge, I was ready for November's challenge. We were all given the task of making a caramel sauce and incorporating it into a cake and frosting. I really loved how this cake turned out: moist, dense, sweet, but not overly sweet.

It so happens to be my dear husband's birthday today, and we celebrated the occasion with his family over Thanksgiving with this cake. The birthday boy and his whole family loved the cake; his uncle from Taiwan even told me that everytime he visits, I have to make the cake. Very flattering indeed, but I have to give props to Shuna Fish Lydon as her recipes were easy to follow to bake a great cake.

Thanks to all the hosts for this month's Daring Bakers' challenge! The lovely host this month is Dolores of Chronicles of Culinary Curiosity and her assistants are Brownie of Blondie and Brownie, Jenny of Foray into Food, and Natalie of Gluten-a-Go-Go.

Caramel Cake with Caramelized Butter Frosting
from Shuna Fish Lydon

Caramel Cake
Ingredients:
10 Tablespoons unsalted butter at room temperature
1 1/4 Cups granulated sugar
1/2 teaspoon kosher salt
1/3 Cup Caramel Syrup (see recipe below)
2 each eggs, at room temperature
splash vanilla extract
2 Cups all-purpose flour
1/2 teaspoon baking powder
1 cup milk, at room temperature

Directions:
1. Preheat oven to 350 degrees F. Butter one tall (2 – 2.5 inch deep) 9-inch cake pan.
2. In the bowl of a stand mixer fitted with a paddle attachment, cream butter until smooth. Add sugar and salt & cream until light and fluffy.
3. Slowly pour room temperature caramel syrup into bowl. Scrape down bowl and increase speed. Add eggs/vanilla extract a little at a time, mixing well after each addition. Scrape down bowl again, beat mixture until light and uniform.
4. Sift flour and baking powder.
5. Turn mixer to lowest speed, and add one third of the dry ingredients. When incorporated, add half of the milk, a little at a time. Add another third of the dry ingredients, then the other half of the milk and finish with the dry ingredients.
6. Take off mixer and by hand, use a spatula to do a few last folds, making sure batter is uniform. Turn batter into prepared cake pan.
7. Place cake pan on cookie sheet or 1/2 sheet pan. Set first timer for 30 minutes, rotate pan and set timer for another 15-20 minutes. Your own oven will set the pace. Bake until sides pull away from the pan and skewer inserted in middle comes out clean. Cool cake completely before icing it. Cake will keep for three days outside of the refrigerator.

Caramel Syrup
Ingredients:
2 cups sugar
1/2 cup water
1 cup water (for "stopping" the caramelization process)

Directions:
1. In a small stainless steel saucepan, with tall sides, mix water and sugar until mixture feels like wet sand. Brush down any stray sugar crystals with wet pastry brush. Turn on heat to highest flame. Cook until smoking slightly and color is a dark amber.
2. When color is achieved, very carefully pour in one cup of water. Caramel will jump and sputter about! It is very dangerous, so have long sleeves on and be prepared to step back.
3. Whisk over medium heat until it has reduced slightly and feels sticky between two fingers. Please wait for it to cool on a spoon before touching it. Note: For safety reasons, have ready a bowl of ice water to plunge your hands into if any caramel should land on your skin.

Caramelized Butter Frosting
Ingredients:
12 tablespoons unsalted butter
1 pound confectioner’s sugar, sifted
4-6 tablespoons heavy cream
2 teaspoons vanilla extract
2-4 tablespoons caramel syrup
Kosher or sea salt to taste

Directions:
1. Cook butter until brown. Pour through a fine meshed sieve into a heatproof bowl, set aside to cool.
2. Pour cooled brown butter into mixer bowl.
3. In a stand mixer fitted with a paddle or whisk attachment, add confectioner's sugar a little at a time. When mixture looks too chunky to take any more, add a bit of cream and or caramel syrup. Repeat until mixture looks smooth and all confectioner's sugar has been incorporated. Add salt to taste.
Note: Caramelized butter frosting will keep in fridge for up to a month. To smooth out from cold, microwave a bit, then mix with paddle attachment until smooth and light.

Saturday, September 27, 2008

Lavash Crackers and Green Chutney


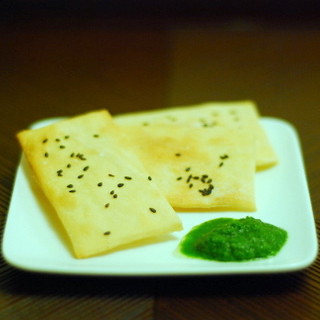
This month's Daring Bakers' challenge was to make lavash crackers with an accompanying dip, hosted by Natalie and co-host Shel. The crackers were easy to make, and though the recipe was gluten-free, I chose to make a fully-gluten version as I used a regular bread flour.

And the chutney? Well, I've craved and eaten significantly more Indian food this month than past months, so the idea of a green chutney immediately popped in my head, and no other dips felt like a fit. It was my first time making it, and it, too, was easy to make. I searched around for various chutney recipes, and decided to try a hybrid of them, adding in an extra pepper because, well, I like my foods spicy. If I ever try my hand at making some Indian curry or other dishes, I'll definitely be making the chutney again.

Lavash Crackers
from The Bread Baker's Apprentice: Mastering the Art of Extraordinary Bread

Ingredients:
1 1/2 cups bread flour
1/2 teaspoon salt
1/2 teaspoon instant yeast
1 tablespoon sugar
1 tablespoon vegetable oil
1/3 to 1/2 cup + 2 tablespoon water, at room temperature
black sesame seeds for topping

Directions:
1. In a mixing bowl, stir together the flour, salt, yeast, sugar, oil, and just enough water to bring everything together into a ball. You may not need the full amount of water, but be prepared to use it all if needed.
2. Sprinkle some flour on the counter and transfer the dough to the counter. Knead for about 10 minutes, or until the ingredients are evenly distributed. The dough should pass the windowpane test and register 77 degrees to 81 degrees Fahrenheit. The dough should be firmer than French bread dough, but not quite as firm as bagel dough, satiny to the touch, not tacky, and supple enough to stretch when pulled. Lightly oil a bowl and transfer the dough to the bowl, rolling it around to coat it with oil. Cover the bowl with plastic wrap.
3. Ferment at room temperature for 90 minutes, or until the dough doubles in size.
4. Mist the counter lightly with spray oil and transfer the dough to the counter. Press the dough into a square with your hand and dust the top of the dough lightly with flour. Roll it out with a rolling pin into a paper thin sheet about 15 inches by 12 inches. You may have to stop from time to time so that the gluten can relax. At these times, lift the dough from the counter and wave it a little, and then lay it back down. Cover it with a towel or plastic wrap while it relaxes. When it is the desired thinness, let the dough relax for 5 minutes. Line a sheet pan with baking parchment. Carefully lift the sheet of dough and lay it on the parchment. If it overlaps the edge of the pan, snip off the excess with scissors.
5. Preheat the oven to 350 degrees Fahrenheit with the oven rack on the middle shelf. Mist the top of the dough with water and sprinkle a covering of sesame seeds or spices on the dough. Use a pizza cutter to precut the cracker, and cut rectangles in the dough. You do not need to separate the pieces, as they will snap apart after baking.
6. Bake for 15 to 20 minutes, or until the crackers begin to brown evenly across the top (the time will depend on how thinly and evenly you rolled the dough).
7. When the crackers are baked, remove the pan from the oven and let them cool in the pan for about 10 minutes. You can then snap them apart or snap off shards and serve.

Green Chutney

Ingredients:
1 bunch fresh cilantro
1 clove garlic
1 tablespoon minced fresh ginger root
2 hot green chili peppers
2 tablespoons lemon juice
1 teaspoon sugar
1/2 teaspoon salt

Directions:
1. Blend all ingredients in a food processor until smooth.

Sunday, August 31, 2008

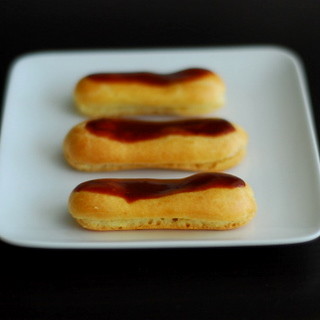
Hazelnut Éclairs


To my defense, I did warn that there could be a lack of posting around here. I gave my oven and taste-testing husband a break during this eventful month. There are plenty of you who travel frequently either for work or leisure much more often than I do, which honestly isn't all that often, and I don't know how you do it. I do love plane rides - yes, even the ones overseas - and I've always had a fascination with airports, but I'm not cut out for the jet-setter lifestyle.

A big reason why is because I'd miss everyday life within a community. I've mentioned before the joy I experience during the monthly women's prayer meetings, and well, my summer travel schedule made me unavailable for them. It's not just the prayer meetings, it's being available to spontaneously hang out with friends and family in the area. I feel like I've missed out on a lot of that this summer, and I could blame it on the little travel I did, or really, what could just be poor time management. All this really has nothing to do with hazelnut éclairs, but I do believe it has to do with baking and my blogging. See, I bake for others, it's how I show my love for people. And when I'm not as involved within my community, I'm not baking as often. If it weren't for the Daring Bakers, maybe I wouldn't have made these!

Thank goodness for the Daring Bakers, and the online community found there. Y'all have saved me from my slump, and I'm ready to get back into the swing of things. I used the praline paste recipe I discovered through last month's Filbert Gateau for a hazelnut cream filling, and the eclairs turned out just lovely. I'll bet my taste-tester is glad to be needed again.

Hazelnut Éclairs
adapted from Chocolate Desserts by Pierre Hermé

Pierre Hermé’s Cream Puff Dough
from Chocolate Desserts by Pierre Hermé

Ingredients:
1/2 cup whole milk
1/2 cup water
1/2 cup unsalted butter, cut into 8 pieces
1/2 teaspoon sugar
1/4 teaspoon salt
1 cup all-purpose flour
5 large eggs, at room temperature

Directions:
1. In a heavy bottomed medium saucepan, bring the milk, water, butter, sugar and salt to the
boil.
2. Once the mixture is at a rolling boil, add all of the flour at once, reduce the heat to medium
and start to stir the mixture vigorously with a wooden spoon. The dough comes together very
quickly. Do not worry if a slight crust forms at the bottom of the pan, it’s supposed to. You
need to carry on stirring for a further 2-3 minutes to dry the dough. After this time the dough
will be very soft and smooth.
3. Transfer the dough into a bowl of a mixer fitted with the paddle attachment. Add the eggs one at a time, beating after each egg has been added to incorporate it into the dough. You will notice that after you have added the first egg, the dough will separate, once again do not worry. As you keep working the dough, it will come back all together again by the time you have added the third egg. In the end the dough should be thick and shiny and when lifted it should fall back into the bowl in a ribbon.
4. The dough should be still warm. Preheat your oven to 375 degrees F. Divide the oven into thirds by positioning the racks in the upper and lower half of the oven. Line two baking sheets with waxed or parchment paper.
5. Fill a large pastry bag fitted with a 2/3 (2cm) plain tip nozzle with the warm cream puff dough.
Pipe the dough onto the baking sheets in long, 4 to 41/2 inches (about 11 cm) chubby fingers.
Leave about 2 inches (5 cm) space in between each dough strip to allow them room to puff.
The dough should give you enough to pipe 20-24 éclairs.
6. Slide both the baking sheets into the oven and bake for 7 minutes. After the 7 minutes, slip the
handle of a wooden spoon into the door to keep in ajar. When the éclairs have been in the
oven for a total of 12 minutes, rotate the sheets top to bottom and front to back. Continue
baking for a further 8 minutes or until the éclairs are puffed, golden and firm. The total baking
time should be approximately 20 minutes.

Chocolate Glaze
from Chocolate Desserts by Pierre Hermé
(makes 1 cup)

Ingredients:
1/3 cup heavy cream
3 1/2 bittersweet chocolate, finely chopped
4 teaspoons unsalted butter, cut into 4 pieces, at room temperature
7 tablespoons Chocolate Sauce (recipe below), warm or at room temperature

Directions:
1. In a small saucepan, bring the heavy cream to a boil. Remove from the heat and slowly begin to add the chocolate, stirring with a wooden spoon or spatula.
2. Stirring gently, stir in the butter, piece by piece followed by the chocolate sauce.

Chocolate Sauce
from Chocolate Desserts by Pierre Hermé
(makes 1 1/2 cups)

Ingredients:
4 1/2 bittersweet chocolate, finely chopped
1 cup water
1/2 cup, or heavy cream
1/3 cup sugar

Directions:
1. Place all the ingredients into a heavy bottomed saucepan and bring to a boil, making sure to stir constantly. Then reduce the heat to low and continue stirring with a wooden spoon until the sauce thickens.
2. It may take 10-15 minutes for the sauce to thicken, but you will know when it is done when it coats the back of your spoon.

Hazelnut Cream
Ingredients:
1 1/2 cups heavy cream
1 1/2 teaspoons granulated sugar
2 1/2 teaspoons praline paste (recipe below)

Directions:
1. Chill mixing bowl and paddle attachment in freezer for about 20 minutes.
2. Add cream, sugar, and praline paste to chilled bowl. Beat on low speed until small bubbles form, about 30 seconds. Increase speed to medium and continue beating until beaters leave a trail, about 30 seconds. Increase speed to high and continue beating until cream is smooth, thick, and nearly doubled in volume, about 30 seconds for stiff peaks.

Praline Paste
from Great Cakes by Carol Walter

Ingredients:
1 cup hazelnuts, toasted/skinless
2/3 cup sugar

Directions:
1. Put the sugar in a heavy 10-inch skillet. Heat on low flame for about 10-20 min until the sugar melts around the edges. Do not stir the sugar. Swirl the pan if necessary to prevent the melted sugar from burning.
2. Brush the sides of the pan with water to remove sugar crystals. If the sugar in the center does not melt, stir briefly. When the sugar is completely melted and caramel in color, remove from heat.
3. Stir in the nuts with a wooden spoon and separate the clusters. Return to low heat and stir to coat the nuts on all sides. Cook until the mixture starts to bubble.
3. Then spread evenly onto a jelly roll pan lined with parchment. As it cools, it will harden into brittle. Break the candied nuts into pieces and place them in the food processor.
4. Pulse into a medium-fine crunch or process until the brittle turns into a powder. To make paste, process for several minutes. Store in an airtight container and store in a cool dry place. Do not refrigerate.

Éclair Assembly

Directions:
1. Slice the éclairs horizontally, using a serrated knife and a gently sawing motion. Set aside the bottoms and place the tops on a rack over a piece of parchment paper.
2. The glaze should be barely warm to the touch (between 95 – 104 degrees F. Spread the glaze over the tops of the éclairs using a metal icing spatula. Allow the tops to set and in the meantime pipe the bottoms with the hazelnut cream.
3. Pipe the hazelnut cream into the bottoms of the éclairs. Make sure you fill the bottoms with enough cream to mound above the pastry. Place the glazed tops onto the pastry cream and wriggle gently to settle them.
4. Served the éclairs immediately after assembling.

Wednesday, July 30, 2008

Filbert Gateau


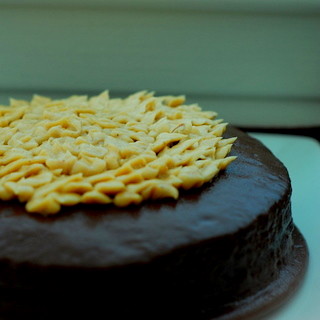
This month's Daring Bakers' challenge was a Filbert Gateau with Praline Buttercream, or simply put, a chocolate hazelnut cake. It's only my second time participating in the Daring Bakers, and I'm already wondering if I'll last the year. Making this cake took me a long time, but it was definitely worth the effort. It was crazy delicious, and I got to share it with my sister-in-law and all her bridesmaids. Thanks to Chris at Mele Cotte for hosting.

Unfortunately, my posts next month might be a bit scarce as I'll be doing some traveling for work and for some friends' weddings. August seems to be the most popular month to get married among my friends. And on that note, can you believe it's already August? The summer is reaching its final days, which makes me dread the cold that will soon follow. You guys have no idea how much I dislike the winter. I used to say I hate the winter, but I'm trying to be mildly more positive. I prefer hot and humid weather so much more than cold and snowy weather, so I get sad when summer winds down. Well, I'll just have to make the most of what's left of it, right?

Filbert Gateau with Praline Buttercream
from Great Cakes by Carol Walter

Filbert Genoise
Ingredients:
1 1/2 cups hazelnuts, toasted/skinned
2/3 cup cake flour, unsifted
2 Tbsp cornstarch
7 egg yolks
1 cup sugar, divided into 1/4 and 3/4 cups
1 tspn vanilla extract
1/2 tspn grated lemon rind
5 egg whites
1/4 cup warm, clarified butter (100 – 110 degrees)

Directions:
1. Position rack in the lower 3rd of the oven and preheat to 350 degrees F. Grease and flour a 10x2 inch round cake pan.
2. Using a food processor, process nuts, cake flour, and cornstarch for about 30 seconds. Then, pulse the mixture about 10 times to get a fine, powdery mixture. Set aside.
3. Put the yolks in the bowl of an electric mixer, with the whisk attachment, and beat until thick and light in color, about 3-4 minutes on med-high speed. Slowly, add ¾ cup of sugar. Blend in the vanilla and grated lemon rind. Remove and set aside.
4. Place egg whites in a large, clean bowl of the electric mixer with the whisk attachment and beat on medium speed, until soft peaks. Increase to med-high speed and slowly add the remaining ¼ cup of sugar, over 15-20 seconds or so. Continue to beat for another ½ minute.
5. Add the yolk mixture to the whites and whisk for 1 minute.
6. Put the nut meal in a mesh strainer (or use your hand – working quickly) and sprinkle it into the egg mixture about 2 tablespoons at a time – folding it carefully for about 40 folds. Be sure to exclude any large chunks/pieces of nuts. Work quickly and carefully as to not deflate the mixture.
7. When all but about 2 Tbsp. of nut meal remains, quickly and steadily pour the warm butter over the batter. Then, with the remaining nut meal, fold the batter to incorporate, about 13 or so folds.
8. With a rubber spatula, transfer the batter into the prepared pan, smoothing the surface with the spatula or back of a spoon.
9. Tap the pan on the counter to remove air bubbles and bake in the preheated oven for 30-35 minutes. You’ll know the cake is done when it is springy to the touch and it separates itself from the side of the pan. Remove from oven and allow to stand for 5 minutes. Invert onto a cake rack sprayed with nonstick coating, removing the pan. Cool the cake completely.

Sugar Syrup
Ingredients:
1 cup water
1/4 cup sugar
2 Tbsp Grand Marnier

Directions:
1. In a small, yet heavy saucepan, bring the water and sugar to a boil and simmer for 5 minutes.
2. Remove from heat, add the liqueur. Cool slightly before using on the cake.

Praline Buttercream
Ingredients:
1 recipe Swiss Buttercream (below)
1/3 cup praline paste (also below)

Directions:
1. Blend 1/2 cup buttercream into the paste, then add to the remaining buttercream.
2. Whip briefly on med-low speed to combine. Blend in rum.

Swiss Buttercream
Ingredients:
4 egg whites
3/4 cup sugar
1 1/2 cups unsalted butter, slightly firm
1 1/2-2 Tbsp Grand Marnier
1 tspn vanilla

Directions:
1. Place the egg whites in a large bowl of a electric mixer and beat with the whisk attachment until the whites are foamy and they begin to thicken (just before the soft peak stage).
2. Set the bowl over a saucepan filled with about 2 inches of simmering water, making sure the bowl is not touching the water. Then whisk in the sugar by adding 1-2 tablespoon of sugar at a time over a minutes time. Continue beating 2-3 minutes or until the whites are warm (about 120 degrees) and the sugar is dissolved. The mixture should look thick and like whipped marshmallows.
3. Remove from pan and with either the paddle or whisk attachment, beat the egg whites and sugar on med-high until its a thick, cool meringue – about 5-7 minutes. Set aside.
4. Place the butter in a separate clean mixing bowl and, using the paddle attachment, cream the butter at medium speed for 40-60 seconds, or until smooth and creamy.
5. On med-low speed, blend the meringue into the butter, about 1-2 Tbsp. at a time, over 1 minute. Add the liqueur and vanilla and mix for 30-45 seconds longer, until thick and creamy.
6. Refrigerate 10-15 minutes before using.

Praline Paste
Ingredients:
1 cup hazelnuts, toasted/skinless
2/3 cup sugar

Directions:
1. Put the sugar in a heavy 10-inch skillet. Heat on low flame for about 10-20 min until the sugar melts around the edges. Do not stir the sugar. Swirl the pan if necessary to prevent the melted sugar from burning.
2. Brush the sides of the pan with water to remove sugar crystals. If the sugar in the center does not melt, stir briefly. When the sugar is completely melted and caramel in color, remove from heat.
3. Stir in the nuts with a wooden spoon and separate the clusters. Return to low heat and stir to coat the nuts on all sides. Cook until the mixture starts to bubble.
3. Then spread evenly onto a jelly roll pan lined with parchment. As it cools, it will harden into brittle. Break the candied nuts into pieces and place them in the food processor.
4. Pulse into a medium-fine crunch or process until the brittle turns into a powder. To make paste, process for several minutes. Store in an airtight container and store in a cook dry place. Do not refrigerate.

Apricot Glaze
Ingredients:
2/3 cup thick apricot preserves
1 Tbsp water

Directions:
1. In a small, yet heavy saucepan, bring the water and preserves to a slow boil and simmer for 2-3 minutes. If the mixture begins to stick to the bottom of the saucepan, add water as needed.
2. Remove from heat and, using a strainer, press the mixture through the mesh and discard any remnants. With a pastry brush, apply the glaze onto the cake while the cake is still warm. If the glaze is too thick, thin to a preferred consistency with drops of water.

Ganache Glaze
Ingredients:
6 oz bittersweet chocolate
6 oz heavy cream
1 Tbsp light corn syrup
1 Tbsp Grand Marnier
¾ tspn vanilla
½ - 1 tspn hot water, if needed

Directions:
1. Blend vanilla and liqueur/rum together and set aside.
2. Break the chocolate into 1-inch pieces and place in the basket of a food processor and pulse until finely chopped. Transfer into a medium sized bowl and set aside.
3. Heat the cream and corn syrup in a saucepan, on low, until it reached a gentle boil. Once to the gently boil, immediately and carefully pour over the chocolate. Leave it alone for one minute, then slowly stir and mix the chocolate and cream together until the chocolate is melted and incorporated into the cream. Carefully blend in vanilla mixture. If the surface seems oily, add ½ - 1 tspn hot water. The glaze will thicken, but should still be pourable.

Assembling Cake
Directions:
1. Cut a cardboard disk slightly smaller than the cake. Divide the cake into 2 layers and place the first layer top-side down on the disk. Using a pastry brush, moisten the layer with 3-4 Tbsp. of warm sugar syrup. Measure out 1 cup of praline buttercream and set aside.
2. Spread the bottom layer with a ¼-inch thickness of the remaining buttercream. Place the middle layer over the first, brush with sugar syrup, spreading with buttercream.
3. Moisten the cut side of the third layer with additional sugar syrup and place cut side down on the cake. Gently, press the sides of the cake to align the layers. Refrigerate to chill for at least 30 minutes.
4. Lift the cake by sliding your palm under the cardboard. Holding a serrated or very sharp night with an 8-inch blade held parallel to the sides of the cake, trim the sides so that they are perfectly straight. Cut a slight bevel at the top to help the glaze drip over the edge. Brush the top and sides of the cake with warm apricot glaze, sealing the cut areas completely. Chill while you prepare the ganache.
5. Place a rack over a large shallow pan to catch the ganache drippings. Remove the gateau from the refrigerator and put it the rack. With a metal spatula in hand, and holding the saucepan about 10 inches above the cake, pour the ganache onto the cake’s center. Move the spatula over the top of the ganache about 4 times to get a smooth and mirror-like appearance. The ganache should cover the top and run down the sides of the cake. When the ganache has been poured and is coating the cake, lift one side of the rack and bang it once on the counter to help spread the ganache evenly and break any air bubbles. (Work fast before setting starts.) Patch any bare spots on the sides with a smaller spatula, but do not touch the top after the “bang”. Let the cake stand at least 15 minutes to set after glazing.
6. Garnish the cake by piping the reserved praline cream in any desired way.
7. Refrigerate uncovered for 3-4 hours to allow the cake to set. Remove the cake from the refrigerator at least 3 hours before serving.
8. Leftover cake can be covered with foil and kept in the refrigerator for up to 5 days.