Showing posts with label fruit. Show all posts

Friday, November 20, 2009

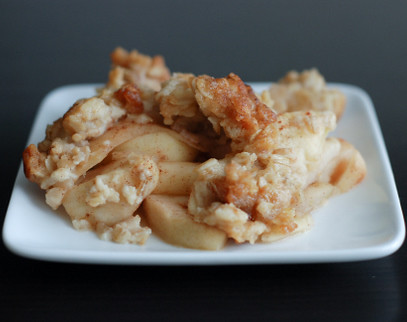
Apple Crisp


Happy Friday, y'all! I've gotten feedback that my recipes here are way too elaborate and involved for the average baker. Considering my posts have been mostly Daring Bakers' posts as of late (this post is for you Audrey!), I completely agree with that statement. I chronicle challenging recipes so that one day when I'm a grandmother of old age, Lord willing, I'll have proof of what my hands were capable of. That'll show the grandkids that crazy grandma isn't just making up stories again. About food, at least.

Here is a really easy recipe that is especially great when you have a bushel of fresh picked apples in the fall. The baking part is certainly easy, but let me warn you that preparing the ingredients will consume a good chunk of time. I recruited an old high school friend to help me in the kitchen for making two of these apple crisps. When she said yes, little did she know she'd be peeling and coring 6 pounds of apples with me! Thank you Judy, for contributing to this delicious apple crisp with your rockin' peeling skills.


Apple Crisp
from Martha Stewart

Ingredients:
3/4 cup all-purpose flour
1/4 cup packed light-brown sugar
1/2 teaspoon salt
1/2 cup plus 2 tablespoons granulated sugar
8 tablespoons unsalted butter, cold, cut into small cubes
1 cup old-fashioned rolled oats
3 pounds apples, peeled, cored, and cut into 1/2-inch chunks
2 tablespoons fresh lemon juice
1/2 teaspoon ground cinnamon

Directions:
1. Preheat oven to 375 degrees F. In a large bowl, mix together flour, brown sugar, salt, and 2 tablespoons granulated sugar.
2. Cut butter into flour, using a pastry blender or two knives, until mixture is the texture of coarse meal. Add oats, and use your hands to toss and squeeze mixture until large, moist clumps form. Transfer to freezer to chill while you prepare apples.
3. In another large bowl, toss apples with lemon juice, cinnamon, and remaining 1/2 cup granulated sugar. Transfer to a shallow 2-quart baking dish, and sprinkle with topping mixture.
4. Place baking dish on a rimmed baking sheet, and bake until golden and bubbling, 55 to 65 minutes. Let cool 10 minutes before serving.
5. For best results, serve with vanilla ice cream.

Thursday, September 24, 2009

Peach Cobbler


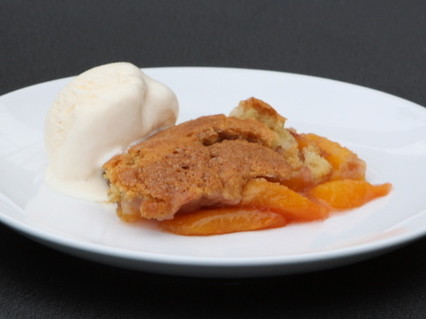
Summer has come and gone, and it sure went by fast. My summer lacked the usual baking, due to the very little desire I had to actually turn on the oven. So what did I do? I grilled and I cooked. And grilled. Nothing encapsulates summer better than grilling, right? I'd go into the stories and recipes behind my summer food if this blog were called Talida Grills, but since this is Talida Bakes, I'll stick with the baked goods.

Way back for Labor Day, my friend Christina of Recette (new restaurant coming soon!) had a BBQ at her new place and stuffed us silly with ribs, chicken, hanger steak, bratwurst, and duck, and even forced us to take the mound of leftovers home with us. After all that meat, it was a miracle people saved room for dessert. But I'm so glad they did, because I prepared a peach cobbler I made as a last hurrah to summer. Now that the weather's cooled down some, I'm ready to turn on that oven and get back to baking.


Peach Cobbler
adapted from Cook's Illustrated

Ingredients:
for the filling
2 1/2 pounds peaches, ripe but firm
1/4 cup granulated sugar
1 teaspoon cornstarch
1 tablespoon lemon juice
pinch table salt

for the topping
1 cup unbleached all-purpose flour
3 tablespoons granulated sugar
3/4 teaspoon baking powder
1/4 teaspoon baking soda
1/4 teaspoon table salt
5 tablespoons unsalted butter (cold), cut into 1/4-inch cubes
1/3 cup whole milk
1 teaspoon granulated sugar

Directions:
1. Adjust oven rack to lower-middle position and heat oven to 425 degrees F.
2. For the filling: Peel peaches, then halve and pit each. Cut each half into 4 wedges. Gently toss peaches and sugar together in large bowl; let stand for 30 minutes, tossing several times.
3. Drain peaches in colander set over large bowl. Whisk 1/4 cup of drained juice (discard extra), cornstarch, lemon juice, and salt together in small bowl. Toss peach juice mixture with peach slices and transfer to 8-inch-square glass baking dish.
4. Bake until peaches begin to bubble around edges, about 10 minutes.
5. For the topping: While peaches are baking, in food processor, pulse flour, 3 tablespoons sugar, baking powder, baking soda, and salt to combine. Scatter butter over and pulse until mixture resembles coarse meal, about ten 1-second pulses.
6. Transfer to medium bowl; add milk and toss with rubber spatula until cohesive dough is formed. (Don't overmix dough or biscuits will be tough.) Break dough into 6 evenly sized but roughly shaped mounds and set aside.
7. To assemble and bake: After peaches have baked 10 minutes, remove peaches from oven and place dough mounds on top, spacing them at least 1/2 inch apart (they should not touch). Sprinkle each mound with portion of remaining 1 teaspoon sugar.
8. Bake until topping is golden brown and fruit is bubbling, 16 to 18 minutes. Cool cobbler on wire rack until warm, about 20 minutes. Serve warm with vanilla ice cream.

Friday, June 12, 2009

Fruit Tartelettes


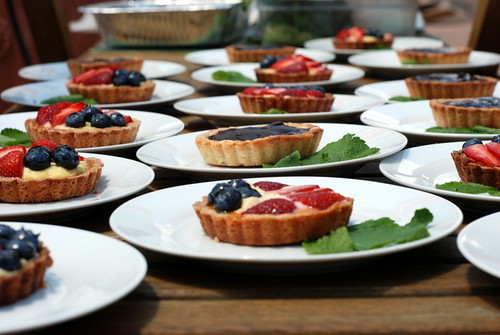
At the baby shower I catered, I provided two options for dessert and the popular option was the fruit tartelette. It being almost summer, and summertime bringing fresh berries probably contributed to the majority's choice.

Making the tartelettes became a day-long event for me as I've still got a lot to learn about making pastries. One rookie mistake I'll never make again: forgetting to line the tartelette shells with parchment paper before baking with beans as pie weights. What happens when you forget the lining? The beans sink into the dough, and you've got to individually pick out the beans while you're left with a tartelette shell filled with many little bean-shaped holes. I didn't plan on spending Friday night picking out beans from the shells dough, but if you know me, you'll recall I've done more daring things.

The tartelettes shaped up nicely in the end, and thanks to the poll results from my Twitter followers, I made the exact quantity of fruit and Nutella tartelettes needed, and the Nutella version will be the subject of my next post.


Fruit Tartelettes
adapted from Cook's Illustrated

Ingredients:
Frozen tartelette shells (recipe below)
Pastry cream (recipe below)
strawberries, washed and sliced
blueberries, washed
Apricot Glaze (recipe below)

Directions:
1. Remove the tartelette from the fluted sides of the pan, by placing your hand under the pan, touching only the removable bottom not the sides. Gently push the tartelette straight up, away from the sides. The fluted tartelette ring will fall away. If you want to remove the bottom of the pan, run a knife or thin metal spatula between the crust and metal bottom.
2. Spread a thin layer of apricot glaze over the bottom and sides of tartelette to prevent the crust from getting soggy. Let the glaze dry between 20 - 30 minutes. Spread the Pastry Cream into the tart, filling about 3/4 full. Level with an offset spatula.
3. To decorate the tartelette you will need 2 to 3 cups of prepared strawberries and blueberries (you may use other fruits like kiwi, pineapple, oranges, melons). Arranging the fruit on the tartelette can be done either randomly or in concentric overlapping circles, starting at the outside edge. Try to cover all the pastry cream with fruit so that no pastry cream is showing through.
4. After arranging the fruit, rewarm the glaze, if using, and gently brush a light coat on the fruit. Do not put it on too thick or it will look like Jell-O. Try not to get any glaze on the tartelette shell. The idea is to make the fruit look shiny. If not serving immediately, refrigerate. Take out about 30 minutes before serving to give the fruit and cream a chance to warm to room temperature.
5. Fruit tarts are best eaten the same day they are assembled. Cover and refrigerate any leftovers.


Pastry Cream
Ingredients:
2 cups half-and-half
1/2 cup granulated sugar
pinch table salt
5 large egg yolks
3 tablespoons cornstarch
4 tablespoons unsalted butter, cold and cut into 4 pieces
1 1/2 teaspoons vanilla extract

Directions:
1. Heat half-and-half, 6 tablespoons sugar, and salt in medium heavy-bottomed saucepan over medium heat until simmering, stirring occasionally to dissolve sugar.
2. Meanwhile, whisk egg yolks in medium bowl until thoroughly combined. Whisk in remaining 2 tablespoons sugar and whisk until sugar has begun to dissolve and mixture is creamy, about 15 seconds. Whisk in cornstarch until combined and mixture is pale yellow and thick, about 30 seconds.
3. When half-and-half mixture reaches full simmer, gradually whisk simmering half-and-half into yolk mixture to temper. Return mixture to saucepan, scraping bowl with rubber spatula; return to simmer over medium heat, whisking constantly, until 3 or 4 bubbles burst on surface and mixture is thickened and glossy, about 30 seconds. Off heat, whisk in butter and vanilla. Transfer mixture to medium bowl, press plastic wrap directly on surface, and refrigerate until cold and set, at least 3 hours or up to 48 hours.


Tart Pastry
Ingredients:
1 large egg yolk
1 tablespoon heavy cream
1/2 teaspoon vanilla extract
1 1/4 cups flour
2/3 cup confectioners' sugar
1/4 teaspoon table salt
8 tablespoons unsalted butter, very cold, cut into 1/2-inch cubes

1. While pastry cream is chilling, whisk together yolk, cream, and vanilla in small bowl; set aside. Pulse to combine flour, sugar, and salt in bowl of food processor fitted with steel blade.
2. Scatter butter pieces over flour mixture; pulse to cut butter into flour until mixture resembles coarse meal, about fifteen 1-second pulses.
3. With machine running, add egg mixture and process until dough just comes together, about 25 seconds.
4. Turn dough onto sheet of plastic wrap and press into 6-inch disk. Wrap in plastic and refrigerate at least 1 hour or up to 48 hours.
5. Remove dough from refrigerator (if refrigerated longer than 1 hour, let stand at room temperature until malleable). Unwrap, divide dough into 4 equal pieces, and roll out between lightly floured large sheets of parchment paper or plastic wrap to 4-inch rounds. (If dough is soft and sticky, slip onto baking sheet and refrigerate until workable, 20 to 30 minutes.)
6. Transfer dough to tartelette pan by rolling dough loosely around rolling pin and unrolling over 4 tartelette pans with removable bottom. Working around circumference of pan, ease dough into pan corners by gently lifting dough with one hand while pressing dough into corners with other hand. Press dough into fluted sides of pan. (If some edges are too thin, reinforce sides by folding excess dough back on itself.) Run rolling pin over top of tartelette pan to remove excess dough.
7. Repeat steps 5 and 6 to fill 4 tartelette pans with dough.
8. Set dough-lined tartelette pans on baking sheet and freeze 30 minutes.
9. Meanwhile, adjust oven rack to middle position and heat oven to 375 degrees. Take dough-lined tartelette pans out of freezer, press 4-inch square of foil inside frozen tartelette shells and over edges and fill with pie weights. (Beans or rice may be used as a substitute.)
10. Bake until golden brown, about 15-18 minutes, rotating halfway through baking time. Remove from oven and carefully remove foil and weights by gathering edges of foil and pulling up and out. 11. Continue to bake until deep golden brown, 3 to 5 minutes longer. Set baking sheet with tartelette shells on wire rack to cool to room temperature, about 30 minutes.


Apricot Glaze
Ingredients:
1/2 cup apricot jam or preserves
1 tablespoon Grand Marnier
1 tablespoon water

Directions:
1. Heat the apricot jam or preserves and water in a small saucepan over medium heat until melted.
2. Remove from heat and strain the jam through a fine strainer to remove any fruit lumps. Add the liqueur at this point. Let cool until it is only slightly warm.

Friday, June 5, 2009

A Catered Baby Shower


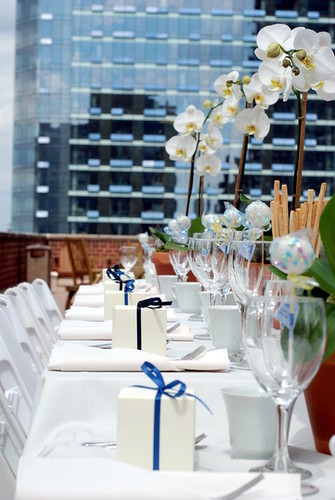
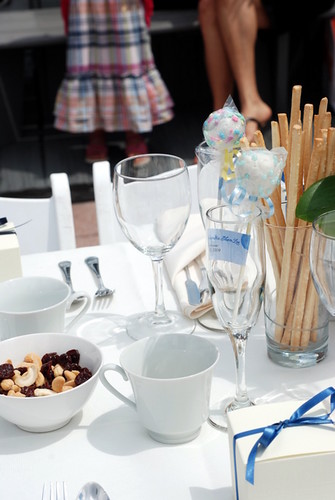
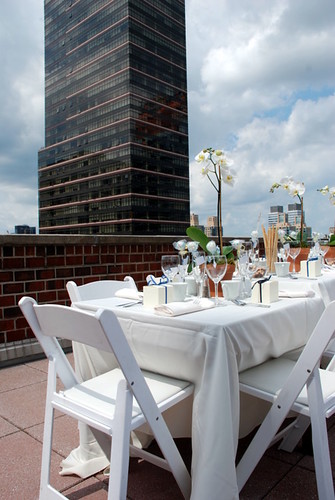
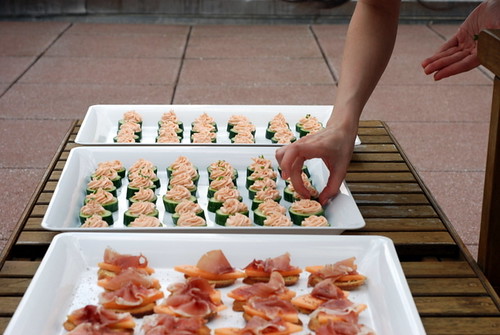
Here are a few shots from the baby shower I catered last weekend. That's right, I don't just bake these days, I do catering too! After the success of Jenn's bridal shower, I kept thinking about how much I enjoyed every aspect of throwing it - working with others in planning and the coordination of food and logistics. What I loved most was that in helping, the guest of honor was left worry-free from the painstaking details needed to make the event successful.

My involvement in the shower kept coming up in conversation from time to time, so when my co-worker told me the news that he and his wife were expecting their first this summer, he had the grand idea of having me cater his shower. I wasn't sure what I was getting myself into, but I jumped at the chance to flex my planning skills.

They wanted an outdoors seated lunch which took some time confirming a venue, but in the end it worked out nicely on the rooftop of a Columbus Circle apartment. What did I come up with in terms of food, you ask? This.


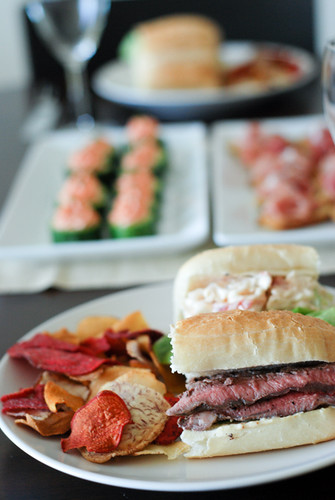
My test run included half a steak roll and half a lobster roll, but the final menu only had full lobster rolls. Below is my menu, and I will have detailed posts on the baked goods in the near future.

Hors D'oeuvres
Smoked Salmon Mousse in Cucumber Cups
Prosciutto Cantaloupe Crostini

Salad
Field Greens and Basil with Balsamic Vinaigrette and Parmesan Crisp

Main Course
Lobster Rolls with Root Chips

Dessert
Fruit Tart/Nutella Tart

Favor
Chocolate Cupcake with Chocolate Ganache

Friday, February 13, 2009

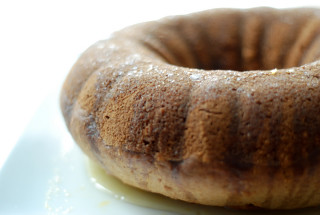
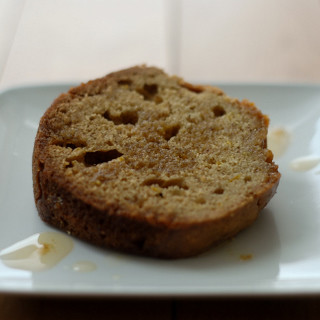
Orange Hazelnut Cake


Many months ago, the lovely Suzana of Home Gourmets sent me a cookbook featuring recipes from the Alps for a little giveaway she did coinciding with her trip to Slovenia. (Thanks again so much, Suzana! I love it!) Still, many months ago, I read it through and marked a few recipes I wanted to try. It wasn't until this week that I actually tried one of them.

I took the original recipe for a walnut cake and transformed it into an orange hazelnut cake. I thought the flavors were fitting for the winter, but ironically we've been having very spring-like weather here in New York! I'm not complaining at all though, and if you know me at all, you know I'd pick hot and humid weather over the cold any day. I guess that's just the Houston gal in me.

And right now this Houston gal is at the airport waiting to board my delayed plane. Tim and I are spending the long weekend visiting my parents. However ya'll are spending the weekend, I hope ya'll enjoy!

Orange Hazelnut Cake
adapted from Cuisine of the Alps by Kay Shaw Nelson

Ingredients:
1/2 cup unsalted butter
1 cup sugar
2 eggs, lightly beaten
2 cups sifted all-purpose flour
1 teaspoon baking powder
1 teaspoon baking soda
1/2 teaspoon ground cinnamon
2/3 cup sour milk
1/2 cup hazelnut paste
grated peel of orange
1 1/2 cups sugar
3/4 cup water
1/4 cup freshly squeezed orange juice
splash of Cointreau

Directions:
1. Preheat the oven to 350 F degrees.Grease a bundt baking pan.
2. In a large bowl cream the butter. Add 1 cup of the sugar and the eggs; blend well.
3. In a medium bowl mix the flour, baking powder, baking soda, and cinnamon. 4. Add flour mixture to the sugar mixture, alternating with the sour milk. Mix well.
5. Stir in hazelnut paste and orange rind. Mix to combine thoroughly. Pour into prepared pan.
6. Bake about 45 minutes, or until a tester inserted into cake comes out clean.
7. Meanwhile, make a thick syrup by boiling together 1 1/2 cups sugar with 3/4 cup water and 1/4 cup freshly squeezed orange juice for 15 minutes. Add in a splash of Cointreau.
8. Pour over the cake while it is still warm. Turn off oven and return cake to the oven for 5 minutes. Serve warm or at room temperature.

Wednesday, January 28, 2009

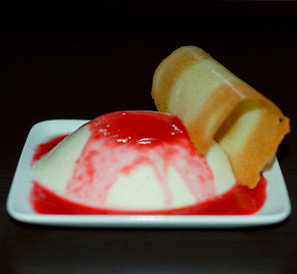
Tuile and Lychee Panna Cotta with Raspberry Puree


Happy New Year! Either I'm very late in saying that or I'm still celebrating the Lunar New Year, you can decide which it is. January certainly flew by for me, and I'm still surprised that my Daring Bakers post is already due. After returning from our marvelous trip out east, I've come back with much more flavor inspiration for my baking this year. Be on the lookout for more exotic desserts in 2009.

A little about tuiles: traditionally, tuiles are thin, crisp almond cookies that are gently molded over a rolling pin or arched form while they are still warm. Once set, their shape resembles the curved French roofing tiles for which they're named. The Dutch angle is that this batter was used to bake flat round cookies on December 31st, representing the year unfold. On New Years day, the same batter was used, but this day they were presented to well-wishers shaped as cigars and filled with whipped cream, symbolizing the New Year that's about to roll on.

In this Daring Bakers' challenge, we were to pair the tuiles up with something light, and I thought of panna cotta after one dinner last week. I decided to add some fruit to it, flavoring the panna cotta with lychee puree and adding raspberry puree as a garnish. The flavors went wonderfully together, and the tuiles were the perfect finish to the dessert.

This month's challenge is brought to us by Karen of Baking Soda and Zorra of 1x umruehren bitte aka Kochtopf. They have chosen Tuiles from The Chocolate Book by Angélique Schmeink and Nougatine and Chocolate Tuiles from Michel Roux.

Tuiles
from Angélique Schmeinck's The Chocolate Book

Ingredients:
1/4 cup softened butter
1/2 cup sifted confectioner’s sugar
1 teaspoon sugar
dash of vanilla extract
2 large egg whites (slightly whisked)
1/2 cup sifted all purpose flour

Directions:
1. Preheat oven to 350F degrees.
2. Using a hand whisk or a stand mixer fitted with the paddle (low speed) and cream butter, sugar, and vanilla to a paste. Keep stirring while you gradually add the egg whites. Continue to add the flour in small batches and stir to achieve a homogeneous and smooth batter/paste. Be careful to not over mix.
3. Cover the bowl with plastic wrap and chill in the fridge for at least 30 minutes to firm up. (This batter will keep in the fridge for up to a week, take it out 30 minutes before you plan to use it).
4. Line a baking sheet with Silpat mat and chill in the fridge for at least 15 minutes. This will help spread the batter more easily if using a stencil. Press the stencil on the baking sheet and use an off sided spatula to spread batter. If foregoing the stencil, use a rubber spatula or piping bag and spread/pipe batter in desired shapes, making sure to leave room in between shapes.
5. Bake in preheated oven for about 5-10 minutes or until the edges turn golden brown. Immediately release from baking sheet and proceed to shape/bend the cookies in the desired shape. These cookies have to be shaped when still warm.


Lychee Panna Cotta
adapted from Gourmet, August 1997

Ingredients:
1 envelope unflavored gelatin (about 1 tablespoon)
2 tablespoons cold water
2 cups heavy cream
1/3 cup milk
3/4 cup sugar
2 cups lychee puree (from 2 cans canned lychee)

Directions:
1. In a very small saucepan sprinkle gelatin over water and let stand about 1 minute to soften. Heat gelatin mixture over low heat until gelatin is dissolved and remove pan from heat.
2. In a large saucepan bring cream, milk, and sugar just to a boil over moderately high heat, stirring. Remove pan from heat and stir in gelatin mixture and lychee puree. Divide cream mixture among eight 1/2-cup ramekins and cool to room temperature. Chill ramekins, covered, at least 4 hours or overnight.
3. Dip ramekins, one at a time, into a bowl of hot water 3 seconds. Run a thin knife around edge of each ramekin and invert ramekin onto center of a small plate.
4. Garnish the panna cotta with raspberry puree and tuile.


Raspberry Puree

Ingredients:
1/2 cup fresh raspberries
1/2 teaspoon sugar
drop of lemon juice

Directions:
1. Using a food processor or blender, blend raspberries, sugar, and lemon juice until it becomes a puree.
2. Strain puree through a cheesecloth, discarding the seeds.

Thursday, July 10, 2008

Lemon Curd and White Chocolate Ganache filled Macarons


When attempting new recipes, I usually do a ton of research by reading many variations of the recipe, and also by getting whatever tips and advice I can. Obviously when it comes to technique, it's hard to learn from just reading or talking about it. I'd tried making macarons before, but like I just said, the technique is hard to master. So I took a macarons class at ICE this past week, and I learned that you can't just follow a recipe to make this cookie. You have to know what to look for at each step, and even then, you just have to be really nice to the cookie and pray that it turns out.

My baking buddy and old college roommate Mel also took the class with me, and we teamed up to make these lemon macarons, which happened to be one Meilleur Ouvrier de France's (MOF) recipe. Here's a macaron fact: all MOF's can't agree on a particular method when making them because depending on a number of factors, different methods produce lovely macarons. The method our recipe used incorporated the sugar with the egg whites at the start of the whipping process, and also did away with any waiting period after piping the cookies, it went straight into the oven. Some methods have that waiting period to allow a skin to form on the macarons, but ours came out just fine.

Oh, and the fillings. We made a plain yellow cookie and originally paired it with lemon curd. We made another batch of vanilla macarons, but we baked them in the cursed oven (our instructor burned her demo macarons in this oven first), and our cookies also cracked and burned. That left us with extra white chocolate ganache to also fill our macarons with. We were a little stingy with our fillings; something else that takes practice. But for Mel and my first duo-baking project, not bad, huh? Together, we make Melida ;)

And thanks to Julie and Crystal for the ICE gift certificate as a bridal shower gift! As you can tell, I already made use of it and loved it.

Sunday, June 29, 2008

Danish Braid


Well look who's gone and joined the Daring Bakers! The Daring Bakers is a group of food bloggers who all bake the same challenging recipe on a monthly basis, all started by Lis and Ivonne. I'm always up for new recipe challenges, so I don't know what's taken me so long to join the group.

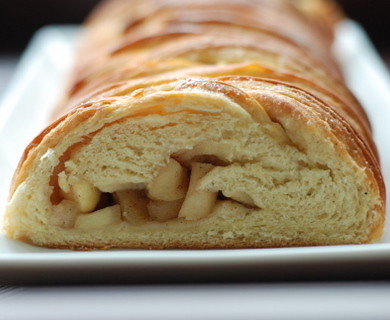
This month's challenge was to make a Danish Braid. I couldn't have been happier as I love the flaky pastry and making pastry dough was on my never ending list of things to bake. It was a challenge all right, but I followed the instructions to a tee and it came out just fine. It's a doozy of a recipe, so read through it and take a guess how long it took me to complete.

Danish Braid
makes 2 large braids
from Sherry Yard’s The Secrets of Baking

Ingredients:
1 recipe Danish Dough (see below)
2 cups apple filling (see below)

1. Line a baking sheet with parchment paper. On a lightly floured surface, roll the dough into a 15 x 20-inch rectangle, ¼ inch thick. If the dough seems elastic and shrinks back when rolled, let it rest for a few minutes, then roll again. Place the dough on the baking sheet.
2. Along one long side of the pastry make parallel, 5-inch-long cuts with a knife or rolling pastry wheel, each about 1 inch apart. Repeat on the opposite side, making sure to line up the cuts with those you’ve already made.
3. Spoon the filling you’ve chosen to fill your braid down the center of the rectangle. Starting with the top and bottom “flaps”, fold the top flap down over the filling to cover. Next, fold the bottom “flap” up to cover filling. This helps keep the braid neat and helps to hold in the filling. Now begin folding the cut side strips of dough over the filling, alternating first left, then right, left, right, until finished. Trim any excess dough and tuck in the ends.

Proofing and Baking
1. Spray cooking spray onto a piece of plastic wrap, and place over the braid.
2. Proof at room temperature or, if possible, in a controlled 90F degree environment for about 2 hours, or until doubled in volume and light to the touch.
3. Near the end of proofing, preheat oven to 400F degrees. Position a rack in the center of the oven.
4. Bake for 10 minutes, then rotate the pan so that the side of the braid previously in the back of the oven is now in the front. Lower the oven temperature to 350F degrees, and bake about 15-20 minutes more, or until golden brown. Cool and serve the braid either still warm from the oven or at room temperature.

Danish Dough
makes 2 1/2 pounds dough

Ingredients:
1 ounce fresh yeast or 1 tablespoon active dry yeast
1/2 cup whole milk
1/3 cup sugar
Zest of 1 orange, finely grated
3/4 teaspoon ground cardamom
1-1/2 teaspoons vanilla extract
1/2 vanilla bean, split and scraped
2 large eggs, chilled
1/4 cup fresh orange juice
3-1/4 cups all-purpose flour
1 teaspoon salt

1 cup cold unsalted butter
1/4 cup all-purpose flour

Dough (detrempe)
1. Combine yeast and milk in the bowl of a mixer fitted with the paddle attachment and mix on low speed. Slowly add sugar, orange zest, cardamom, vanilla extract, vanilla seeds, eggs, and orange juice. Mix well.
2. Change to the dough hook and add the salt with the flour, 1 cup at a time, increasing speed to medium as the flour is incorporated. Knead the dough for about 5 minutes, or until smooth. You may need to add a little more flour if it is sticky.
3. Transfer dough to a lightly floured baking sheet and cover with plastic wrap. Refrigerate for 30 minutes.

Butter Block
1. Combine butter and 1/4 cup flour in the bowl of a mixer fitted with a paddle attachment and beat on medium speed for 1 minute. Scrape down the sides of the bowl and the paddle and then beat for 1 minute more, or until smooth and lump free. Set aside at room temperature.
2. After the detrempe has chilled 30 minutes, turn it out onto a lightly floured surface. Roll the dough into a rectangle approximately 18 x 13 inches and ¼ inch thick. The dough may be sticky, so keep dusting it lightly with flour.
3. Spread the butter evenly over the center and right thirds of the dough. Fold the left edge of the detrempe to the right, covering half of the butter. Fold the right third of the rectangle over the center third. The first turn has now been completed. Mark the dough by poking it with your finger to keep track of your turns, or use a sticky and keep a tally. Place the dough on a baking sheet, wrap it in plastic wrap, and refrigerate for 30 minutes.
4. Place the dough lengthwise on a floured work surface. The open ends should be to your right and left. Roll the dough into another approximately 13 x 18 inch, ¼-inch-thick rectangle. Again, fold the left third of the rectangle over the center third and the right third over the center third. No additional butter will be added as it is already in the dough. The second turn has now been completed. Refrigerate the dough for 30 minutes.
5. Roll out, turn, and refrigerate the dough two more times, for a total of four single turns. Make sure you are keeping track of your turns. Refrigerate the dough after the final turn for at least 5 hours or overnight. The Danish dough is now ready to be used. If you will not be using the dough within 24 hours, freeze it. To do this, roll the dough out to about 1 inch in thickness, wrap tightly in plastic wrap, and freeze. Defrost the dough slowly in the refrigerator for easiest handling. Danish dough will keep in the freezer for up to 1 month.

Apple Filling
makes enough for 2 braids

Ingredients:
4 Fuji apples, peeled, cored, and cut into ¼-inch pieces
1/2 cup sugar
1 tsp. ground cinnamon
1/2 vanilla bean, split and scraped
1/4 cup fresh lemon juice
4 tablespoons unsalted butter

1. Toss all ingredients except butter in a large bowl.
2. Melt the butter in a sauté pan over medium heat until slightly nutty in color, about 6 - 8 minutes.
3. Add the apple mixture and sauté until apples are softened and caramelized, 10 to 15 minutes.

Tuesday, April 15, 2008

Lemon Bars


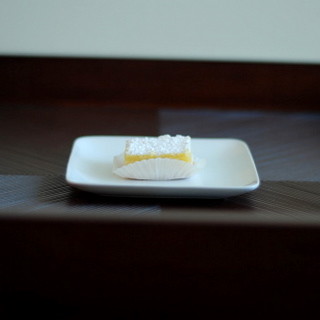
To tell you the truth, these lemon bars existed over a few weeks ago. I don't have an excuse for delaying the post - I just never got around to writing it. And now, I don't even a story to tell about the lemon bars. I suppose I can talk about the leftover lemons that are still sitting in the fridge, but that's not really interesting. Or perhaps I made the lemon bars because I could anticipate the sunny mood I'd be in when I would finally write the post. Sure, why not. I'm currently in a cheery mood because the weather's finally reaching warmer temperatures around here! I never got used to the cold weather being a Texan gal, so I'm a happy camper during the summer time. It's not summer yet, but at least I can retire my winter coat for now. Back to the lemons... they sure are sunny and cheery.

Lemon Bars
adapted from The Barefoot Contessa Cookbook

Ingredients:
1/2 pound unsalted butter
1/2 cup granulated sugar
2 cups flour
1/8 teaspoon salt

4 extra-large eggs at room temperature
1 2/3 cups granulated sugar
1 tablespoon + 1 teaspoon grated lemon zest (3 to 4 lemons)
2/3 cup freshly squeezed lemon juice
2/3 cup flour
Confectioners’ sugar, for dusting

Directions:
1. Preheat the oven to 350F and grease a 9x13 baking sheet.
2. For the crust, cream the butter and sugar until light in the bowl of an electric mixer fitted with the paddle attachment.
3. Combine the flour and salt and, with the mixer on low, add to the butter until just mixed.
4. Dump the dough onto a well-floured board and gather into a ball. Flatten the dough with floured hands and press it into the greased baking sheet, building up a 1/2-inch edge on all sides. Chill.
5. Bake the crust for 15 to 20 minutes, until very lightly browned. Let cool on a wire rack. Leave the oven on.
6. For the lemon layer, whisk together the eggs, sugar, lemon zest, lemon juice, and flour. Pour over the crust and bake for about 25 minutes. Let cool to room temperature.
7. Cut into squares and dust with confectioners’ sugar.