Showing posts with label bread. Show all posts

Tuesday, January 18, 2011

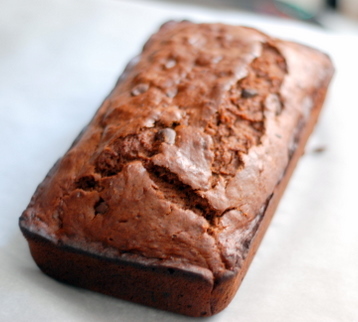
Chocolate Banana Loaf


We had a wonderfully tiring weekend, visiting friends from all over. We drove over 700 miles, stopped in 5 different cities and met adorable baby Joseph, played with a bunch of little kids, chatted with a handful of college friends, had dinner with my old church small group, and even saw a few friends from our high school days. There were many more we wish we could have seen, but we're saving them for another trip.

I made this chocolate banana loaf for Jon, one of the coolest friends we have. Thanks for hosting us and for treating us to some great soondubu! Glad you were able to eat some Sunday morning, and I hope you've enjoyed more since. :)

Among all the catching up, we were asked how our families are doing, and we heard some great compliments about our family members. Specifically, we heard from Tim's high school buddy how he recalls my mother-in-law, Mama, being the sweetest person he's ever met. Mama, I hope that you're reading this and that you realize you've touched many people's hearts with your love and kindness. Happy Birthday to my dear mother-in-law!


Chocolate Banana Loaf

Ingredients:
1 3/4 cups all-purpose flour
1/4 cup unsweetened cocoa powder
3/4 cup sugar
1 teaspoons baking powder
1/4 teaspoon baking soda
1/4 teaspoon salt
1/2 cup chocolate chips
2 large eggs
1/2 cup unsalted butter, melted
4-6 ripe bananas, mashed well
1 teaspoon pure vanilla extract

Directions:
1. Preheat oven to 350 degrees F.
2. Butter and flour the bottom and sides of a loaf pan.
3. In a large bowl mix the dry ingredients together (flour, sugar, cocoa, baking powder, baking soda, and salt)
4. In another bowl combine the wet ingredients: bananas, eggs, melted butter, and vanilla.
5. Fold the banana mixture into the dry ingredients until just combined. Then fold in the chocolate chips.
6. Pour batter into prepared pan. Bake about 60 minutes until bread has risen and a cake tester comes out clean.
7. Let cool slightly, remove loaf from pan, and serve warm.

Friday, January 14, 2011

Baba's Mantou 饅頭


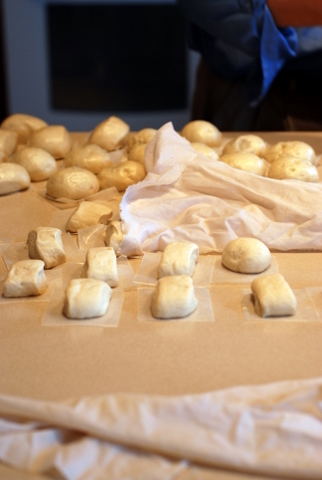
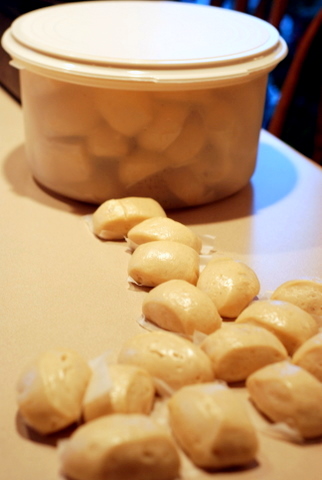
Happy Birthday Baba! It's my father-in-law's birthday today, and I'd like to take some time today to share one of his recipes with all of you. I had the pleasure of visiting Fort Wayne, IN for Christmas, and I was delighted to help my father-in-law makes these for the big Christmas Eve gathering their church held at their home. Christmas Eve is just one example of my in-laws' hospitality towards their community. I hear many stories of their lovely home gatherings, inviting over church friends, neighbors, as well as students from North Side High School (where my mother-in-law teaches), and I was blessed to participate in one of their parties during Christmas.


For our Christmas dinner, we doubled the recipe below and made close to 80 buns! I certainly pulled my weight in eating them up as I must have eaten at least a dozen during our time there. Thanks for sharing your recipe with me, Baba, and I hope to learn many more recipes from you!


Baba's Mantou 饅頭
makes around 40 buns

Ingredients:
3 tablespoons yeast
3 tablespoons sugar
4 cups warm water
1 tablespoon baking powder
12 cups all-purpose flour
1 tablespoon shortening
1 cup red bean paste
40 - 2" squares of cut wax paper

Directions:
1. Sprinkle yeast and sugar over the the warm water, let stand for about 30 minutes until yeast bubbles.
2. Meanwhile, mix together flour and baking powder, and cut shortening into flour mixture.
3. Make a well in the flour mixture, pour in yeast mixture, and start mixing to form a dough.
5. Knead dough on floured surface until smooth, then cover with moist paper towel and let stand for about two hour in a warm place until the dough doubles in size.
6. Punch down dough and knead one more time and let stand for another 20 minutes.
7. Prepare steamer and begin to boil water.
8. Knead dough to shape into long rolls and cut across the roll to form mantou.
9. To make red bean paste filled mantou, roll one section of dough into a flat circle, put 1 tablespoon of red bean paste in the center, and pinch dough closed, forming a bun.
10. Stick one square of wax paper to the bottom of each shaped mantou and cover with damp paper towel until dough is used up.
11. Place mantou carefully in steamer, leaving enough space in between. Steam mantou for 10-12 minutes.

Friday, July 30, 2010

Homemade Hamburger Buns


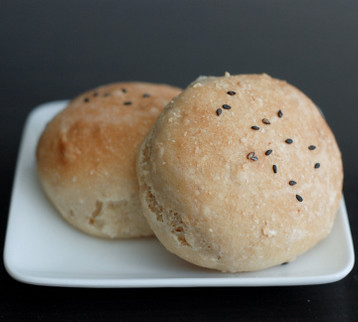
It's been high barbeque season for a while, and though I've been a little quiet this summer, I'd like to share a hamburger bun recipe for your next barbeque. Sure, it takes more time than going out and buying a bag of pre-made buns, but it's more fun to make things from scratch. Oh, don't tell me I'm the only one. I used a recipe from Nicole of Baking Bites, so clearly I am not alone.

Sure, it takes some time to let the dough rise, but if you let that happen in the fridge overnight, you can avoid spending hours watching dough rise. Now I may be the only one who does that for entertainment, but that is why I used the fridge trick this time.

The original recipe calls for whole wheat flour and brown sugar, and I swapped it with all-purpose flour and honey. The buns were soft and sweet, and I would make them again. If not in this barbeque season, then certainly in the next one. You should really consider making them too!


Hamburger Buns
adapted from Baking Bites

Ingredients:
1 1/4 cups warm water
2 1/2 teaspoons active dry yeast
2 tablespoons honey
1/2 cup oats
2-3 cups all-purpose flour
1 1/2 teaspoon salt
1-2 tablespoons black sesame seeds

Directions:
1. Combine 1/4 cup of the water with the yeast in a large bowl or the bowl of an electric mixer. Let stand for 5-10 minutes, until foamy. Stir in the rest of the water, honey, oats, salt and 1 1/2 cups of flour.
2. Using the dough hook attachment on the mixer, mix the dough together. Add in the remaining flour 1/4 cup at a time until the dough comes together into a ball and pulls away from the sides of the mixing bowl.
3. When the dough pulls away from the sides of the bowl, turn it out onto a lightly floured flat surface. Knead the dough for about 5 minutes, until it is smooth and elastic. Place in a lightly greased bowl, cover with plastic wrap, and let rise in a warm place for about 1 hour or overnight in fridge.
4. Let dough rise until doubled in size. If left to rise in fridge overnight, let thaw for about 1 hour. Once doubled in size, turn the dough out onto a lightly floured surface and press into a rectangle. Divide into eight equal pieces.
5. To shape the buns, draw up the corners of each piece of dough and pinch together, forming a tight ball. Place, seam side down, on a parchment/Silpat lined baking sheet, spaced about 2 inches apart.
6. Sprinkle the tops with black sesame seeds and let rise for 45 minutes, covered with a clean dishtowel, until almost doubled in size.
7. Bake at 375F for 20-25 minutes, until golden brown. The rolls will sound hollow when tapped on the bottom. Transfer to a wire rack to cool completely before serving. The rolls will soften slightly as they sit. Recipe makes 8 buns.

Friday, February 20, 2009

Taro Bread


Tim and I had a great time in Houston last weekend - we spent quality time with my parents, ate a lot of great food, and met up with some of my oldest and dearest friends. And when I say old I mean longest relationships.

Well, it's been about a year since my last visit to Houston, and I've got a couple things to note. First, I love I-10! Last I saw it, it was still one big mess, but now it's 18 wide lanes of a smooth Texas highway. While driving there, I told Tim that I miss driving, but he corrected me, knowing that I really miss driving on nice freeways like I-10. Tim's right, that's exactly what I meant.

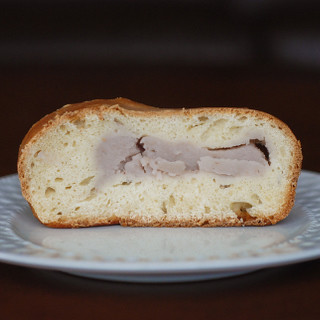
Second thing to note - Houston's Chinatown keeps exploding everytime I visit. Why, I remember when the only supermarkets were Diho and Dynasty, but now there are dozens of them! Dozens! And all the bubble tea shops, cafes, and bakeries multiply right along with the supermarkets. Growing up, I remember our family would frequent a particular bakery solely for their taro bread. Now, it wasn't bread flavored with taro, rather it was a loaf of soft white bread baked with a generous amount of sweet taro paste inside. The loaf was also topped with a light glaze with coconut flakes. I very clearly remember the bread, but all I remember about the bakery is that it's located in Diho square. (I might have to ask around for more details) Well that bread was the inspiration for this post. I took Julia Child's classic white bread recipe and turned it into a taro bread by filling the inside with taro paste.

Making bread is a way to teach me patience. I clearly don't have any as I didn't wait the entire 45 minutes for the bread to double in size before sticking it in the oven, thus my bread didn't come out as full as it should have. I decided to go ahead with the batch to see how it'd turn out, and thankfully it was still tasty, just lacking in the desired texture. I wouldn't change a thing about the taro paste, and now that I have a go-to taro paste recipe, I'm brainstorming what other taro goods I can come up with. I hope you're intrigued. I hope.

Taro Bread
recipe adapted from Baking with Julia

Ingredients:
1/4 cup warm water
1 cup warm milk
2 tablespoons active dry yeast
1 teaspoon salt
1 tablespoon sugar
2 tablespoons unsalted butter, melted
3-4 cups bread flour or all-purpose flour
1 cup Taro Paste (recipe below)

Directions:
1. Pour 1/4 cup of the water into a bowl and mix with yeast. Let sit for 5 minutes.
2. Combine the milk, sugar, and butter. Blend well with the yeast mixture.
3. Using a stand mixer with dough hook, beat in 2 cups of flour into the mixture. Mix slowly until blended then add the rest of the flour.
4. Increase speed and scrape down the sides til the dough comes together. Add salt and mix at medium speed for 10 minutes until dough is smooth and elastic.
5. Turn dough out on lightly floured surface and shape it into a ball then place in a large buttered or oiled bowl.
6. Turn dough so it is completely coated in the fat, then cover in plastic for 45 minutes to an hour, til it has doubled in size at room temperature.
7. Butter a loaf pan.
8. Deflate the dough, and turn out onto a lightly floured surface.
9. Roll out into a 9 x 12-inch rectangle. Spread taro paste around the middle of the rectangle.
10. With the short end facing you, fold the dough into thirds over the paste, creating a roll.
11. Pinch the seam closed, and pinch the ends enough so it will fit in the loaf pan. Place in the loaf pan seam side down.
12. Cover the loaves with buttered plastic wrap and allow to rise again in a warm place for 45 minutes, or until they double in size.
13. Preheat the oven to 375°F and put the rack in the center of the oven.
14. Bake for 35-45 minutes until they are honey brown.
15. Immediately turn out of pans onto a rack to cool.

Taro Paste

Ingredients:
1 1/2 cups small taro pieces (peel and cut fresh taro)
1/2 cup water
1/4 cup sugar (up to 1/2 cup, depending on desired sweetness)
1 tablespoon corn starch
2 tablespoons water

Directions:
1. Boil or steam the taro pieces until cooked. Taro is done when a fork easily pokes through.
2. In a food processor or blender, blend the cooked taro and 1/2 water until it becomes a puree.
3. Mix the corn starch with 2 tablespoons water to make a paste.
4. Combine paste into taro puree and pour into a saucepan.
5. Cook taro puree and paste over low-medium heat, stirring in the sugar. Keep adding sugar until taro paste reaches desired sweetness.
6. Constantly stir the paste, and reduce the heat when the paste becomes thicker. Stir over low heat an additional 10-15 minutes.
7. Remove paste from heat and let cool.