Showing posts with label tarts. Show all posts

Friday, May 21, 2010

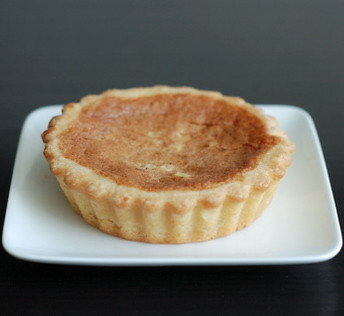
Mini Dan Ta


You must know by now that it's springtime. Okay, so it may already be borderline summertime, but I haven't written a proper spring post yet.

Springtime brings new growth in the form of plants and love. From my experience, I can agree with that. Seven years ago during Spring Break, Tim and I started dating. Two years ago, we got married in the spring. Just this month there were two engagements among my friends (Congrats Rich+Tonnie! Congrats Yedeh+Quyen!), and we've already attended three weddings this year.

Last weekend, I attended a college friend's lovely bridal shower upstate in Beacon, and thinking about bridal showers made me realize I never posted the dan ta recipe I made for Tina's bridal shower. Oh, the horror! You can imagine me hitting myself like Dobby for going against the master that is blogging. Not really, but Harry Potter's been on my mind for whatever reason.

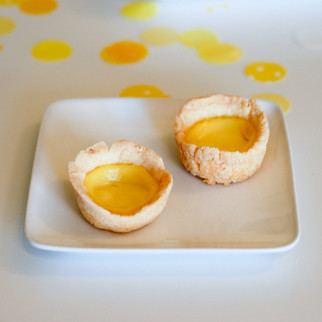
I made mini dan ta for Tina's bridal shower because she loves circles and the color yellow. She also makes delicious dan ta, but ironically her husband does not eat eggs (along with many other things). I've eaten many, many dan ta in my life, but this was my first time making them, and I was pleased with their ease. In the future, I'd like to try using lard for the tart shell in place of butter to attain that super flaky texture. How dangerously delicious would that be?


Mini Dan Ta (Chinese Egg Tart)
adapted from various sources

Tart Shell Ingredients:
1 1/2 cups flour
1/2 cup butter
1 egg, beaten
pinch of salt

Egg Custard Ingredients:
4 cups milk
5 large eggs
1/3 cup granulated sugar
pinch of salt

Directions:
1. In a medium bowl, sift together the flour and salt.
2. Mix in the butter until reaching a crumbly mixture.
3. Stir in egg and mix until forming a dough.
4. Shape dough into 1/2 inch balls, flattening each ball into tart mold (or mini muffin pan). Be sure to cover the bottom and shape dough against the sides of the mold so that dough is higher than the sides.
5. Preheat oven to 350 degrees F.
6. Combine all custard ingredients into a medium saucepan over low heat.
7. Whisk custard gently until all sugar is dissolved.
8. Strain egg custard through a sieve and let cool.
9. Fill the tart shells with the egg custard to be 3/4 full.
10. Bake for 15-20 minutes until golden brown.
11. Let cool slightly and remove from molds before serving.

Saturday, June 27, 2009

Bakewell Tart/Pudding


The June Daring Bakers' challenge was hosted by Jasmine of Confessions of a Cardamom Addict and Annemarie of Ambrosia and Nectar. They chose a Traditional (UK) Bakewell Tart... er... pudding that was inspired by a rich baking history dating back to the 1800's in England.

When I saw that this month's Daring Bakers' challenge was a tart, I laughed out loud. I had plenty of practice making tarts last month, so I sure was ready for this challenge! This recipe sounded delicious as I love anything almond flavored, and this tart had almond both in the pastry dough as well as in the frangipane. Some call this a tart, some call it a pudding, I would actually call it a cake-tart. The frangipane did turn out semi-spongy, but I couldn't see any resemblance to a pudding. Whatever you wish to name it, it paired mighty well with both blueberry preserves and Nutella.

Thanks, Jasmine (Confessions of a Cardamom Addict) and Annemarie (Ambrosia and Nectar) for hosting this month!


Bakewell Tart/Pudding


Ingredients:
Sweet shortcrust pastry (recipe below)
Frangipane (recipe below)
1 cup blueberry preserves OR 1 cup Nutella, warmed
Bench flour

Directions:
1. Place the chilled dough disc on a lightly floured surface. If it's overly cold, you will need to let it become acclimatized for about 15 minutes before you roll it out. Flour the rolling pin and roll the pastry to ¼ inch thickness, by rolling in one direction only (start from the center and roll away from you), and turning the disc a quarter turn after each roll.
2. When the pastry is to the desired size and thickness, transfer it to the tart pan, press in and trim the excess dough. Patch any holes, fissures or tears with trimmed bits. Chill in the freezer for 15 minutes.
3. Preheat oven to 400 F degrees.
4. Remove shell from freezer, spread as even a layer as you can of preserves or Nutella onto the pastry base. Top with frangipane, spreading to cover the entire surface of the tart.
5. Smooth the top and put into the oven for 30 minutes. Five minutes before the tart is done, the top will be brownish. Remove from oven and strew flaked almonds on top and return to the heat for the last five minutes of baking.
6. The finished tart will have a golden crust and the frangipane will be tanned and a bit spongy-looking. Remove from the oven and cool on the counter. Serve warm, with crème fraîche, whipped cream or custard sauce if you wish.


Sweet Shortcrust Pastry
Ingredients:
1 cup flour
2 tablespoons sugar
½ tsp salt
1/2 cup unsalted butter, cold
2 egg yolks
1/2 teaspoons almond extract
1-2 tablespoons cold water

Directions:
1. Sift together flour, sugar and salt.
2. Grate butter into the flour mixture, using the large hole-side of a box grater. Using your finger tips only, and working very quickly, rub the fat into the flour until the mixture resembles bread crumbs. Set aside.
3. Lightly beat the egg yolks with the almond extract and quickly mix into the flour mixture. Keep mixing while dribbling in the water, only adding enough to form a cohesive and slightly sticky dough.
4. Form the dough into a disc, wrap in cling and refrigerate for at least 30 minutes.


Frangipane
Ingredients:
9 tablespoons unsalted butter, softened
1/2 cup icing sugar
3 eggs
1/2 teaspoons almond extract
1/2 cup ground almonds
2 tablespoons flour

Directions:
1. Cream butter and sugar together for about a minute or until the mixture is primrose in color and very fluffy.
2. Scrape down the side of the bowl and add the eggs, one at a time, beating well after each addition. The batter may appear to curdle, but that's alright.
3. After beating the eggs in, pour in the almond extract and mix for about another 30 seconds and scrape down the sides again.
4. With the beaters on, spoon in the ground nuts and the flour. Mix well. The mixture will be soft, keep its slightly curdled look and retain its pallid yellow color.

Thursday, June 18, 2009

Nutella Tartelettes


Am I still posting about that baby shower I catered? Yes, and hang tight, I'm almost done. After this, there's only one more post left, I promise.

This Nutella tartelette was truly decadent, filled with three varying layers of chocolate. First, Nutella lines the bottom of the tartelette shell. Next is a dark chocolate pudding, and finally, the tartelette is topped with a dark chocolate ganache. This was not the design of the original recipe, but I decided to mix things up a bit. Actually, the truth is, my pudding didn't turn out quite right (I manhandled it and also overcooked it just a tad), and I had to serve something presentable to the ladies at the shower, so on went the dark chocolate ganache topping. After tasting it myself, you couldn't even tell the pudding was a little off.

If you're a dark chocolate lover, then oh boy, you definitely want to try making and eating this tartelette. Be sure to watch the time when you're baking the tartelettes, and you'll be on your way to rich, chocolatey bliss.


Nutella Tartelettes
adapted from Chocolate Desserts by Pierre Herme

Ingredients:
2/3 cup Nutella
4 3/4 oz bittersweet chocolate
7 tablespoons butter
1 large egg, room temperature, stirred with a fork
3 large egg yolks, room temperature, stirred with a fork
2 tablespoons sugar
4 baked tartelette shells (recipe below)

Directions:
1. Adjust oven rack to middle position and heat oven to 375 F degrees.
2. Spread the Nutella evenly over the bottom of the crust and set aside.
3. Melt the chocolate and the butter separately - either by using a double boiler or in the microwave. Allow both chocolate and butter to cool slightly.
4. Whisk the egg into the chocolate, stirring gently in circles and taking care not to agitate the mixture as you don't want to beat air into the ganache. Little by little, stir in the egg yolks, then the sugar. Finally, still working gently, stir in the warm melted butter. Pour the ganache over the Nutella in the tart shell.
5. Bake tart for 11 minutes. Center of tart will not be completely set, but that's how it should be. Remove the tart from the oven, and cool on a cooling rack to room temperature.
6. Additional step: If the pudding turns out too hard and crumbly looking, simply add a layer of dark chocolate ganache to hide the flaws. It's definitely still edible, and the extra layer of chocolate will add to this tart's decadence.


Tart Pastry
adapted from Cook's Illustrated

Ingredients:
1 large egg yolk
1 tablespoon heavy cream
1/2 teaspoon vanilla extract
1 1/4 cups flour
2/3 cup confectioners' sugar
1/4 teaspoon table salt
8 tablespoons unsalted butter, very cold, cut into 1/2-inch cubes

Directions:
1. Whisk together yolk, cream, and vanilla in small bowl; set aside. Pulse to combine flour, sugar, and salt in bowl of food processor fitted with steel blade.
2. Scatter butter pieces over flour mixture; pulse to cut butter into flour until mixture resembles coarse meal, about fifteen 1-second pulses.
3. With machine running, add egg mixture and process until dough just comes together, about 25 seconds.
4. Turn dough onto sheet of plastic wrap and press into 6-inch disk. Wrap in plastic and refrigerate at least 1 hour or up to 48 hours.
5. Remove dough from refrigerator (if refrigerated longer than 1 hour, let stand at room temperature until malleable). Unwrap, divide dough into 4 equal pieces, and roll out between lightly floured large sheets of parchment paper or plastic wrap to 4-inch rounds. (If dough is soft and sticky, slip onto baking sheet and refrigerate until workable, 20 to 30 minutes.)
6. Transfer dough to tart pan by rolling dough loosely around rolling pin and unrolling over 4 tartelette pans with removable bottom. Working around circumference of pan, ease dough into pan corners by gently lifting dough with one hand while pressing dough into corners with other hand. Press dough into fluted sides of pan. (If some edges are too thin, reinforce sides by folding excess dough back on itself.) Run rolling pin over top of tart pan to remove excess dough.
7. Repeat steps 5 and 6 to fill 4 tartelette pans with dough.
8. Set dough-lined tartelette pans on baking sheet and freeze 30 minutes.
9. Meanwhile, adjust oven rack to middle position and heat oven to 375 degrees. Take dough-lined tartelette pans out of freezer, press 4-inch square of foil inside frozen tartelette shells and over edges and fill with pie weights. (Beans or rice may be used as a substitute.)
10. Bake until golden brown, about 15-18 minutes, rotating halfway through baking time. Remove from oven and carefully remove foil and weights by gathering edges of foil and pulling up and out.
11. Continue to bake until deep golden brown, 3 to 5 minutes longer. Set baking sheet with tartelette shells on wire rack to cool to room temperature, about 30 minutes.

Friday, June 12, 2009

Fruit Tartelettes


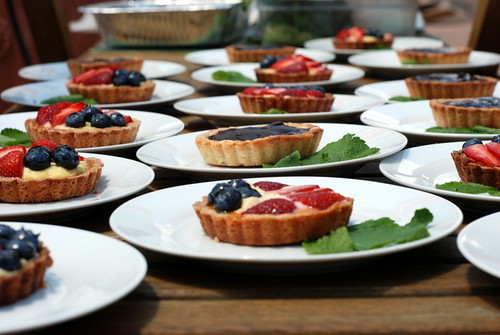
At the baby shower I catered, I provided two options for dessert and the popular option was the fruit tartelette. It being almost summer, and summertime bringing fresh berries probably contributed to the majority's choice.

Making the tartelettes became a day-long event for me as I've still got a lot to learn about making pastries. One rookie mistake I'll never make again: forgetting to line the tartelette shells with parchment paper before baking with beans as pie weights. What happens when you forget the lining? The beans sink into the dough, and you've got to individually pick out the beans while you're left with a tartelette shell filled with many little bean-shaped holes. I didn't plan on spending Friday night picking out beans from the shells dough, but if you know me, you'll recall I've done more daring things.

The tartelettes shaped up nicely in the end, and thanks to the poll results from my Twitter followers, I made the exact quantity of fruit and Nutella tartelettes needed, and the Nutella version will be the subject of my next post.


Fruit Tartelettes
adapted from Cook's Illustrated

Ingredients:
Frozen tartelette shells (recipe below)
Pastry cream (recipe below)
strawberries, washed and sliced
blueberries, washed
Apricot Glaze (recipe below)

Directions:
1. Remove the tartelette from the fluted sides of the pan, by placing your hand under the pan, touching only the removable bottom not the sides. Gently push the tartelette straight up, away from the sides. The fluted tartelette ring will fall away. If you want to remove the bottom of the pan, run a knife or thin metal spatula between the crust and metal bottom.
2. Spread a thin layer of apricot glaze over the bottom and sides of tartelette to prevent the crust from getting soggy. Let the glaze dry between 20 - 30 minutes. Spread the Pastry Cream into the tart, filling about 3/4 full. Level with an offset spatula.
3. To decorate the tartelette you will need 2 to 3 cups of prepared strawberries and blueberries (you may use other fruits like kiwi, pineapple, oranges, melons). Arranging the fruit on the tartelette can be done either randomly or in concentric overlapping circles, starting at the outside edge. Try to cover all the pastry cream with fruit so that no pastry cream is showing through.
4. After arranging the fruit, rewarm the glaze, if using, and gently brush a light coat on the fruit. Do not put it on too thick or it will look like Jell-O. Try not to get any glaze on the tartelette shell. The idea is to make the fruit look shiny. If not serving immediately, refrigerate. Take out about 30 minutes before serving to give the fruit and cream a chance to warm to room temperature.
5. Fruit tarts are best eaten the same day they are assembled. Cover and refrigerate any leftovers.


Pastry Cream
Ingredients:
2 cups half-and-half
1/2 cup granulated sugar
pinch table salt
5 large egg yolks
3 tablespoons cornstarch
4 tablespoons unsalted butter, cold and cut into 4 pieces
1 1/2 teaspoons vanilla extract

Directions:
1. Heat half-and-half, 6 tablespoons sugar, and salt in medium heavy-bottomed saucepan over medium heat until simmering, stirring occasionally to dissolve sugar.
2. Meanwhile, whisk egg yolks in medium bowl until thoroughly combined. Whisk in remaining 2 tablespoons sugar and whisk until sugar has begun to dissolve and mixture is creamy, about 15 seconds. Whisk in cornstarch until combined and mixture is pale yellow and thick, about 30 seconds.
3. When half-and-half mixture reaches full simmer, gradually whisk simmering half-and-half into yolk mixture to temper. Return mixture to saucepan, scraping bowl with rubber spatula; return to simmer over medium heat, whisking constantly, until 3 or 4 bubbles burst on surface and mixture is thickened and glossy, about 30 seconds. Off heat, whisk in butter and vanilla. Transfer mixture to medium bowl, press plastic wrap directly on surface, and refrigerate until cold and set, at least 3 hours or up to 48 hours.


Tart Pastry
Ingredients:
1 large egg yolk
1 tablespoon heavy cream
1/2 teaspoon vanilla extract
1 1/4 cups flour
2/3 cup confectioners' sugar
1/4 teaspoon table salt
8 tablespoons unsalted butter, very cold, cut into 1/2-inch cubes

1. While pastry cream is chilling, whisk together yolk, cream, and vanilla in small bowl; set aside. Pulse to combine flour, sugar, and salt in bowl of food processor fitted with steel blade.
2. Scatter butter pieces over flour mixture; pulse to cut butter into flour until mixture resembles coarse meal, about fifteen 1-second pulses.
3. With machine running, add egg mixture and process until dough just comes together, about 25 seconds.
4. Turn dough onto sheet of plastic wrap and press into 6-inch disk. Wrap in plastic and refrigerate at least 1 hour or up to 48 hours.
5. Remove dough from refrigerator (if refrigerated longer than 1 hour, let stand at room temperature until malleable). Unwrap, divide dough into 4 equal pieces, and roll out between lightly floured large sheets of parchment paper or plastic wrap to 4-inch rounds. (If dough is soft and sticky, slip onto baking sheet and refrigerate until workable, 20 to 30 minutes.)
6. Transfer dough to tartelette pan by rolling dough loosely around rolling pin and unrolling over 4 tartelette pans with removable bottom. Working around circumference of pan, ease dough into pan corners by gently lifting dough with one hand while pressing dough into corners with other hand. Press dough into fluted sides of pan. (If some edges are too thin, reinforce sides by folding excess dough back on itself.) Run rolling pin over top of tartelette pan to remove excess dough.
7. Repeat steps 5 and 6 to fill 4 tartelette pans with dough.
8. Set dough-lined tartelette pans on baking sheet and freeze 30 minutes.
9. Meanwhile, adjust oven rack to middle position and heat oven to 375 degrees. Take dough-lined tartelette pans out of freezer, press 4-inch square of foil inside frozen tartelette shells and over edges and fill with pie weights. (Beans or rice may be used as a substitute.)
10. Bake until golden brown, about 15-18 minutes, rotating halfway through baking time. Remove from oven and carefully remove foil and weights by gathering edges of foil and pulling up and out. 11. Continue to bake until deep golden brown, 3 to 5 minutes longer. Set baking sheet with tartelette shells on wire rack to cool to room temperature, about 30 minutes.


Apricot Glaze
Ingredients:
1/2 cup apricot jam or preserves
1 tablespoon Grand Marnier
1 tablespoon water

Directions:
1. Heat the apricot jam or preserves and water in a small saucepan over medium heat until melted.
2. Remove from heat and strain the jam through a fine strainer to remove any fruit lumps. Add the liqueur at this point. Let cool until it is only slightly warm.

Friday, June 5, 2009

A Catered Baby Shower


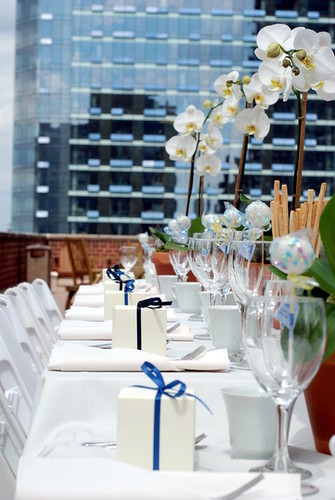
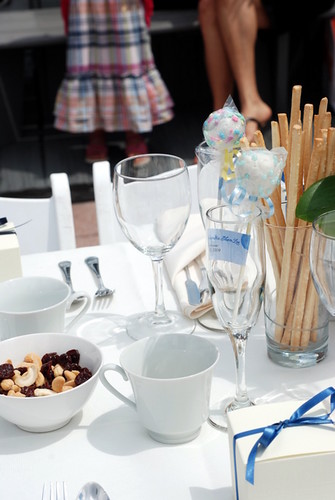
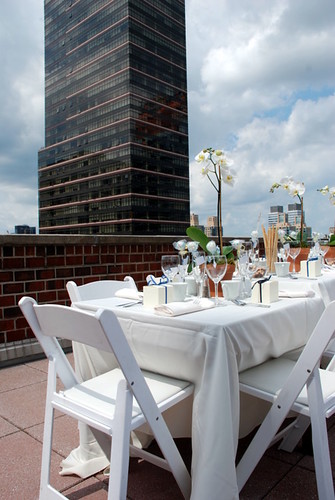
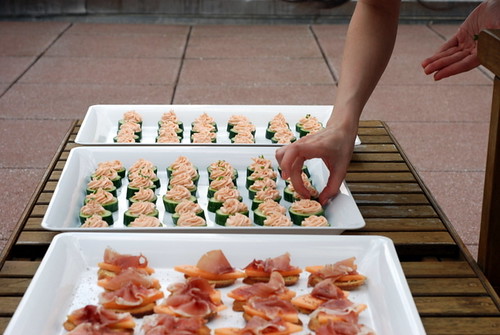
Here are a few shots from the baby shower I catered last weekend. That's right, I don't just bake these days, I do catering too! After the success of Jenn's bridal shower, I kept thinking about how much I enjoyed every aspect of throwing it - working with others in planning and the coordination of food and logistics. What I loved most was that in helping, the guest of honor was left worry-free from the painstaking details needed to make the event successful.

My involvement in the shower kept coming up in conversation from time to time, so when my co-worker told me the news that he and his wife were expecting their first this summer, he had the grand idea of having me cater his shower. I wasn't sure what I was getting myself into, but I jumped at the chance to flex my planning skills.

They wanted an outdoors seated lunch which took some time confirming a venue, but in the end it worked out nicely on the rooftop of a Columbus Circle apartment. What did I come up with in terms of food, you ask? This.


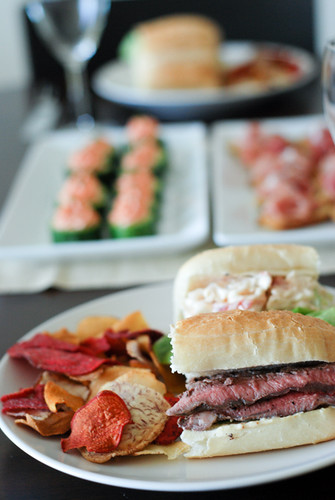
My test run included half a steak roll and half a lobster roll, but the final menu only had full lobster rolls. Below is my menu, and I will have detailed posts on the baked goods in the near future.

Hors D'oeuvres
Smoked Salmon Mousse in Cucumber Cups
Prosciutto Cantaloupe Crostini

Salad
Field Greens and Basil with Balsamic Vinaigrette and Parmesan Crisp

Main Course
Lobster Rolls with Root Chips

Dessert
Fruit Tart/Nutella Tart

Favor
Chocolate Cupcake with Chocolate Ganache